When it comes to professional image editing, the difference between an average image and a high-converting one can be as subtle as a few seconds. While a clipping path might appear as a simple line, even the smallest errors can result in product images that appear unnatural, unprofessional, or inconsistent, particularly on competitive eCommerce platforms in the USA such as Amazon and Shopify. Not all of these problems are apparent on the surface. They may seem minor, but when customers are presented with dozens of photos of products side by side, their flaws become apparent. Once you know what these mistakes are, and how to avoid them—you can significantly enhance your visuals and conversion rates.
Small Mistakes But Big Impact
Knowing clipping path is not similar to doing clipping path. In the U.S. market, product images are not only pictures, but also selling instruments. Trust is lost in a single moment if there is a slight rough edge, an unnatural shadow or inconsistent cutouts. Even platforms such as Amazon have certain requirements for the accuracy of photos, as they refuse to accept images that don't adhere to their guidelines. This is why professional editors do much more than “cut out” your pictures they enhance, tweak and polish all of their details.
Common Errors and Fixes
I have talked with several clipping path experts from Clipping Mask Asia to identify the most common issues they find while doing QC before delivering clipping path service project. According to their opinion the editors commit the following mistakes while creating the pen tool selection around any product photos:
Overusing Anchor Points
One common error that beginners often make when creating a path is placing an excessive number of anchor points. This is mostly because someone tries to trace all the curves manually instead of letting the computer do all the work. The result is rarely smooth. The edges become rough, the curves become distorted and the object loses its natural look. The addition of more points does not always mean that you are becoming more precise, on the contrary, it means that your quality is going down. A more professional approach would be to use fewer anchor points and make the curves smooth with the help of Bézier handles. If done correctly, the curve will flow naturally along the object. An optimal zoom setting for the operation should be within the 200-300% range.
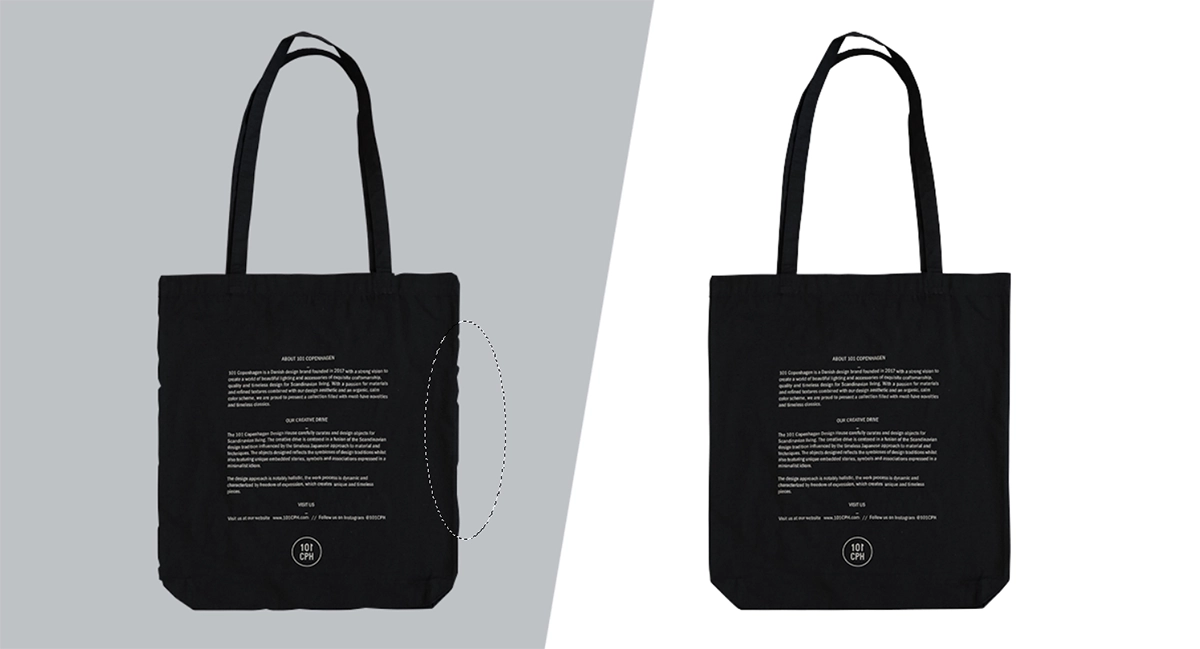
Cutting Too Tight (or Too Loose)
The other common problem is not following the true edge of the object. Some editors cut too tight, overlooking the finer details and some editors leave too much room, resulting in a halo effect around the subject. Both problems cause the image to appear unnatural. A product may look warped or out of context in its background, impacting customer perception of quality. The main point is to follow the contour of the object as close as possible to its natural shape. In certain situations, it is possible to add a little to the image and still end up with a good realism, particularly for images with soft edges or compressed images. Also, a little feathering can be helpful, but not too much or it will get blurry.
Using Clipping Path for Hair or Fur
Clipping paths are created for hard edges, not soft edges such as hair or fur. When it comes to cutting these areas with a path, it is very difficult to achieve sharp, non-realistic edges and fine details are completely lost. That's why professional editors adapt their techniques to the subject. In the case of soft edges, image masking yields much better results as it retains transparency and detail. In practice, most of the advanced edits use both techniques. A clipping path is used for the solid parts of the object, and masking is used on the fine details. Selecting and masking with tools such as Adobe Photoshop can greatly facilitate this process.
Working Without Proper Zoom
When it comes to precision work, there's no substitute for visibility. A low zoom level makes it hard to see fine details, which can cause the edges to be uneven and imperfections to be missed when creating paths. An editor who is looking at a zoomed out view may assume that the image is clean, only to find that it isn't when it is viewed at full resolution. This is when the inconsistencies are easily seen. The disciplined workflow includes the ability to switch from one zoom level to another. The zoom is used to make sure the path is accurate when creating it, but is also sometimes needed to keep the overall shape and size of the object when zooming out.
Skipping Refinement
Drawing the path is HALF of the process. its Refinement which differentiates professional from average. Curves can be a little bit off, corners a bit sharp and edges may not match without refinement. These small imperfections add up, especially when images are displayed in large catalogs or high-resolution formats. Once a path has been completed, veteran editors always review and tweak anchor points, smooth curves and consistency throughout. This additional step will consume time but will make a great difference in the final product.
Ignoring Shadows and Depth
One of the common mistakes people make is that they think they are getting rid of the background, and consequently, the shadows. In fact, shadows are an integral part of a product's appearance that can make it look grounded and realistic. When shadows are completely removed, the object can appear as if it’s floating. This will decrease the depth and create an artificial look to the image. It's preferable to maintain natural shadows wherever possible. If the original shadow doesn’t work, a subtle, realistic shadow can be added during editing. Some professionals even make a separate path for shadows to have complete control.
Using the Wrong Technique for Complex Objects
A simple clipping path will not suffice for all images. More complicated objects, like jewelry, bicycles or layered products, call for more complicated techniques. In many cases, simple path on these images results in loss of detail and incorrect edges. Major components might be simplified or omitted. In such cases, multi-layer clipping paths or a combination of clipping and masking techniques work better. When the object is divided into parts, you can control and edit them more precisely.
Lack of Consistency Across Images
Lack of consistency is a big mistake, but it does have a significant impact on the perception of a brand. If the product images are not aligned or the style or spacing of the shadows is not consistent, it looks unprofessional. This problem might not be apparent to the customer, but they will feel it. Having uniform editing style for all the pictures gives a neat and uniform appearance. This includes maintaining consistent margins, aligning objects consistently, and adding shadows consistently. If your business is dealing with huge amounts of images, it is important to establish a set of guidelines for editing.
Final Thoughts
Clipping path errors are seldom serious, but rather often minute details that add up over time. However, in eCommerce, where images can make a significant impact on purchases, the details are crucial. The purpose is not only to eliminate a background but to produce a natural, refined and believable image. Learning about precision, the proper techniques, and how to improve your work can help you steer clear of the most frequent mistakes and create professional-quality work.
Understand the most frequent clipping path errors and their solutions for producing tidy and expert product photographs. Enhance edge quality, shadows and consistency for improved eCommerce conversions.

Asha is working as a Creative Director at Clipping Mask Asia. She has completed her Graduation from the University of Dhaka inFilm and Television Studies. She has vast knowledge in Photography, Videography, Video Editing, 3D Modeling, Rendering and Animation. She loves to explore the creative world with her academic knowledge, experience and creative mind. She writes creative blogs on design, illustration and editing for renowned brands like Clipping Mask Asia.