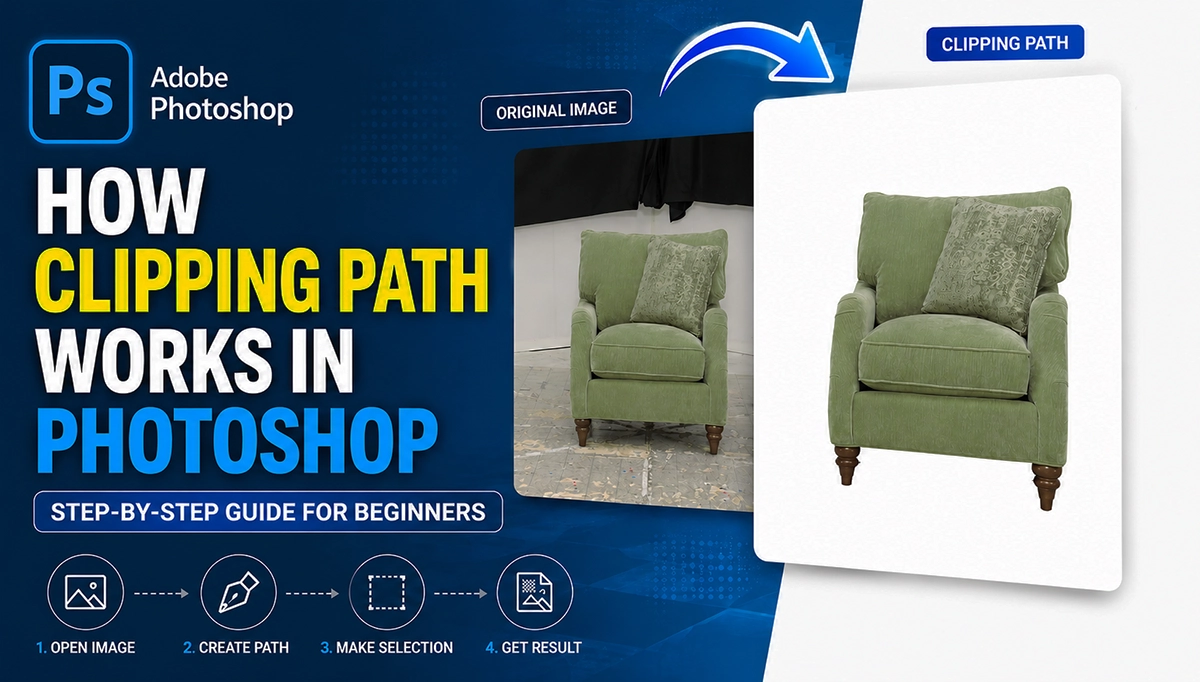
If you are dealing with product images, you should know how clipping path works in Photoshop. It is considered as one of the most effective and sophisticated background removal methods.
Unlike automatic tools, clipping path allows full control over edges, curves, and details of the subject. Nevertheless, it is perfect for eCommerce product photos or other images of serious purpose.
In this guide, you will learn the steps of creating clipping path using Adobe Photoshop.
What Is Clipping Path in Photoshop?
A clipping path in Adobe Photoshop is a vector path created around an object to extract from the background.
The path is drawn using the pen tool in Photoshop. It creates the selection by following the edges with anchor points and curves. Once the path is complete, you can activate the selection and remove the background.
For instance, clipping path is the mostly used photo editing technique as it ensures clean, sharp, and accurate cutouts.
Why Use Clipping Path Instead of Automatic Tools?
There are number of automatic tools for background removal. Most of them struggle with complex edges or detailed objects and fails to attain professional cutout quality.
Clipping path in Photoshop is a complete manual process. It gives better accuracy and ensures smooth edges. As a result, the final image looks natural and commercial standard.
Therefore, if quality is the core concern, clipping path is the best option. Most of the ecommerce brands ensure expert clipping path solutions to prepare their photos for website and publications.
Tools You Need in Photoshop
Photoshop pen tool is the primary tool used for clipping path. Pen tool creates and connects anchor points to create a vector path around the object. The process also involves the paths panel and layer plates.
Step-by-Step: How Clipping Path Works in Photoshop
Step 1: Open Your Image
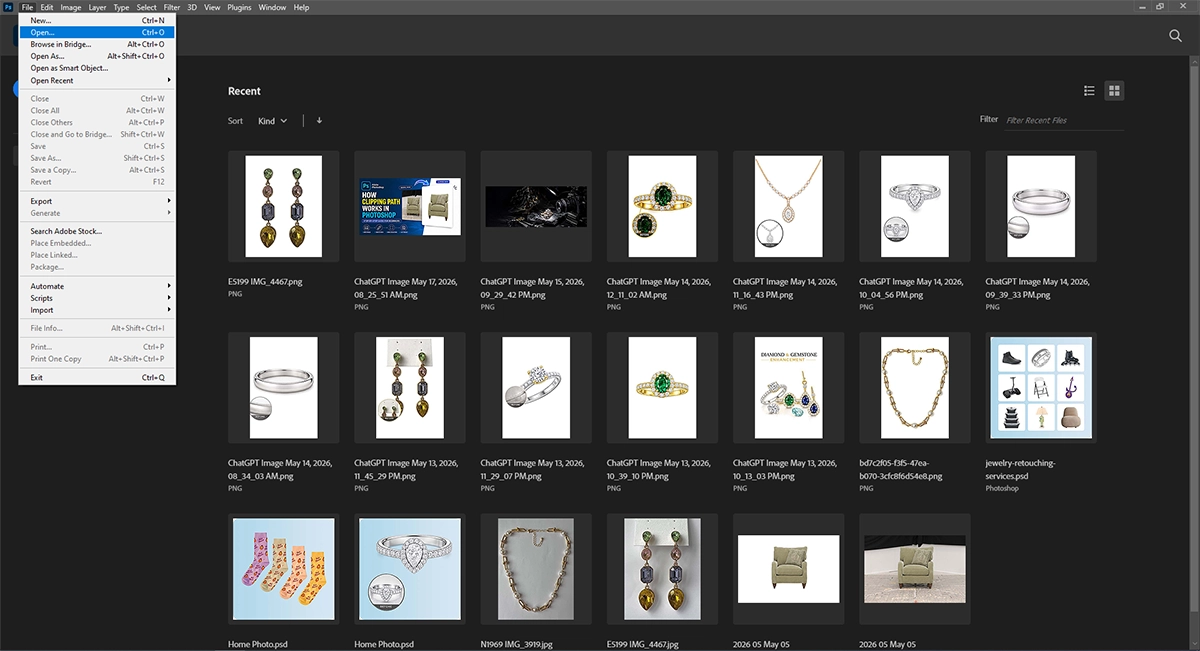
The first step is to open the image in Photoshop. We always prefer high resolution raw files for better path quality.
Step 2: Select the Pen Tool

The next step is to activate the Pen Tool from the toolbar. The tool works like a real-life pen for drawing the selection around the object. Make sure you are working in “Path” mode instead of shape mode.
Step 3: Start Drawing the Path
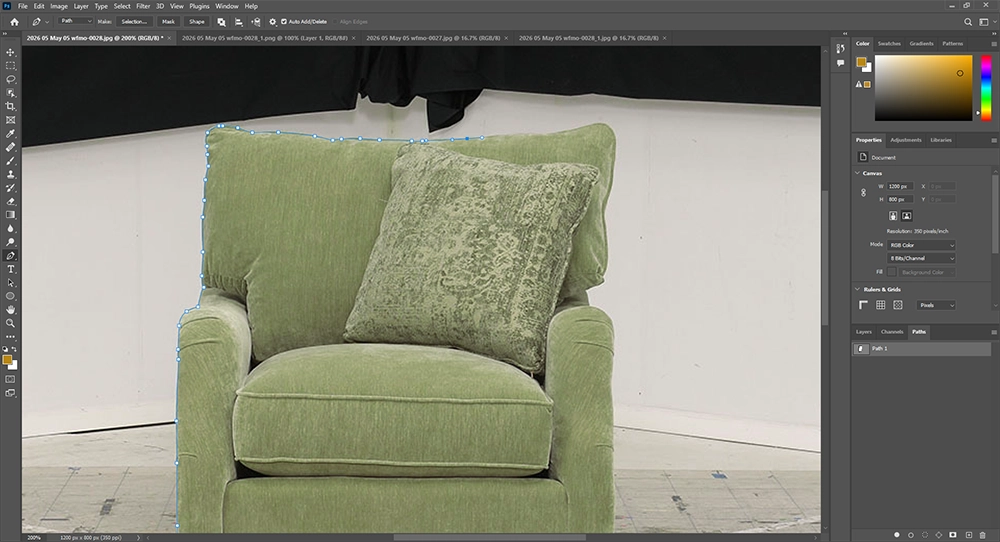
Now, start creating clipping path with anchor points. For straight edges, simple clicks are enough. For curves and zigzag area click and drag to adjust the vector line accordingly.
Follow the object carefully. Keep the path close to the edges for accurate results. In order to ensure pro quality work with 200% to 300% zoom.
Step 4: Complete the Path
Continue drawing until you reach the starting point. Click on the first anchor point to close the path.
Now, you have a complete clipping path around the object.
Step 5: Convert Path into Selection
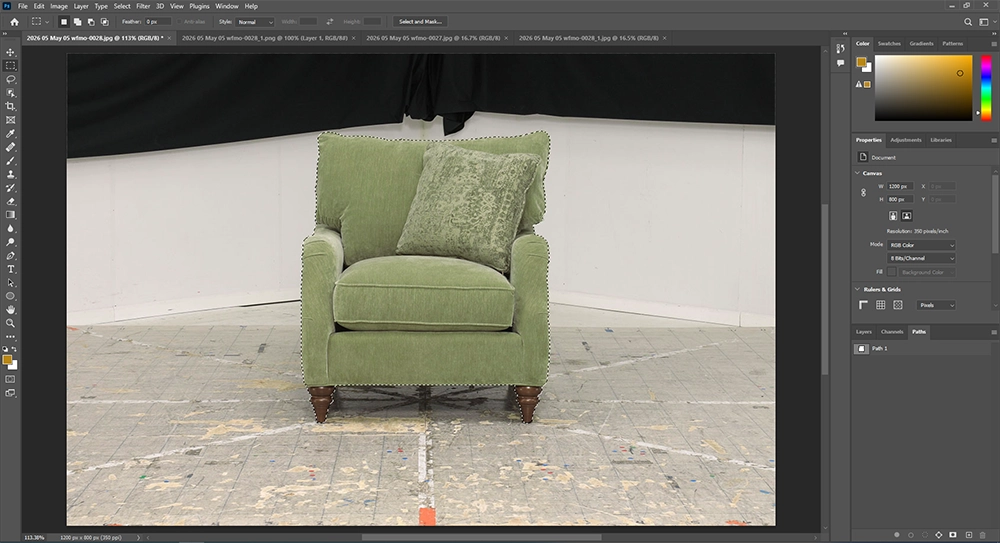
Let’s convert the path into a selection. Rename the path layer (Work Path) into Path 1. Now, the path can be converted into selection by simply clicking right button on the path layer and selecting “Make Selection…”. It can also be done by holding Ctrl/Command and clicking on the path layer.
Step 6: Remove or Change Background
Once the selection is active, remove the background with the shortcut key: Ctrl/Command + j or with a layer mask.
In consequence, it will allow to place the object on a white background, transparent background, or any other background.
Tips for Better Clipping Path Results
Creating a perfect clipping path is not as easy as learning the process. It requires a lot of practice with patience.
Don’t forget to zoom in and zoom out frequently, while working to define edges clearly. Use fewer anchor points for smoother curves. Always follow the natural shape of the object. Don’t cut too far inside or outside the edges.
Common Mistakes by the Beginners
The most common mistake by the beginner is about placing anchor points incorrectly. It results in creating uneven edges and unnatural shapes.
Another issue is the use of excessive anchor points. In case of straight-line use two or three anchor points. While going through any curve click and drug the anchor point to adjust the line according to the shape.
Sometimes the beginner also forgets to close the path properly. Rushing the process often leads to poor results.
Final Thoughts
Learning how clipping path works in Photoshop is an important skill for anyone. Whether you are dealing images for professional purpose or not, you should know this basic knowledge. It can be very handy for creating clean and professional visuals for both personal and business purpose. Although it takes time to become an expert, the benefits it offers make the effort worthy.

Asha is working as a Creative Director at Clipping Mask Asia. She has completed her Graduation from the University of Dhaka inFilm and Television Studies. She has vast knowledge in Photography, Videography, Video Editing, 3D Modeling, Rendering and Animation. She loves to explore the creative world with her academic knowledge, experience and creative mind. She writes creative blogs on design, illustration and editing for renowned brands like Clipping Mask Asia.