Today, this tutorial will show you how to make background transparent in Photoshop.
Using this method will give you more flexibility in choosing the colors you want to use and give you the ability to change any image with a background.
We will also discuss different dimensions of making an image transparent.
Make Background Transparent in Photoshop
Method-01
The essential part of any image is the background. So, when processing images, the most effective way to create the best appearance is to use the background in some form or another.
In case of preparing a photo for eCommerce, you might have to follow a particular guideline.
Editing photos for large eCommerce giant like Amazon, you have to put their suggested background only.
Otherwise, you won't be able to list your products over there. Now let's start with the step-by-step tutorial about how to make logo transparent background in Photoshop.' Good Luck Buddy 🙂
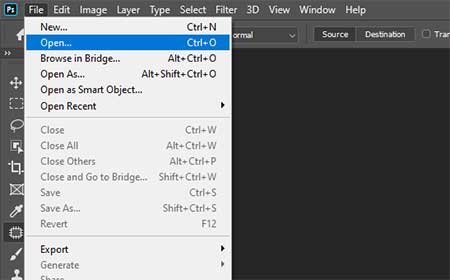
Step -01: Open your image in Photoshop layer
At first, open your Photoshop program. You can use any version of Adobe Photoshop from CS3 to the latest version of Photoshop.
Open your desired file in Photoshop by clicking File > Open.
We have imported a bull image to make the tutorial. The format of the file was jpg. You can have PSD, tiff, png as well.
Now, adjust layers accordingly to go to the next step of the background removal tutorial. Open layer panel by selecting Windows > Layers from the top menu bar.
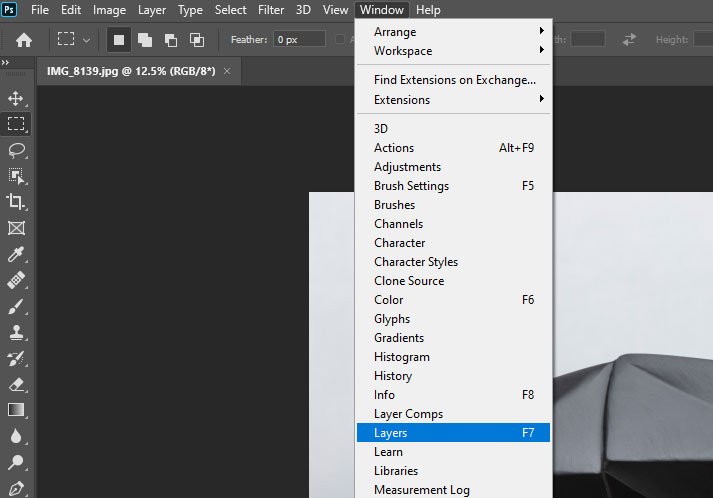
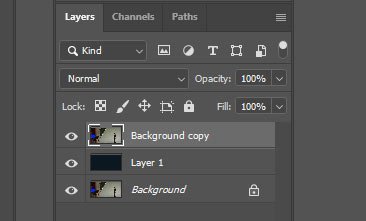
In the layer panel, you must be seeing a default layer named 'Background.'
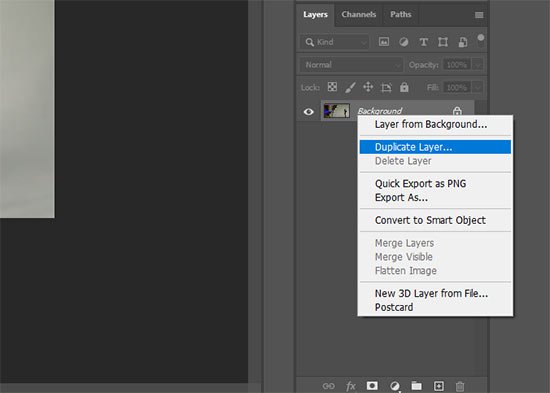
We always suggest keeping the background layer as it is. So, we will work on a copied layer.
Click the right button of your mouse on the background layer select 'Duplicate Layer.'
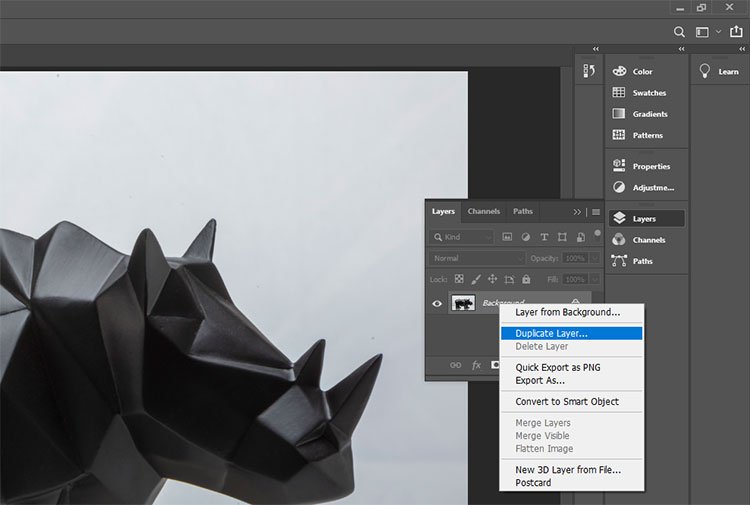
Turn off the 'Background' layer. We will work on the ' Background copy ' layer.
Step-02: Decide which method to apply
The second step is significant. If your image has a plain background like pure white or gray, you can use quick selection tool.
If the image has a different background with multiple colors and shadows, you should create Photoshop pen tool selection.
The picture we have selected needs pen tool selection.
If your image has one plain color background, please go down to see how to make a white background transparent.
Step-03: Make a selection
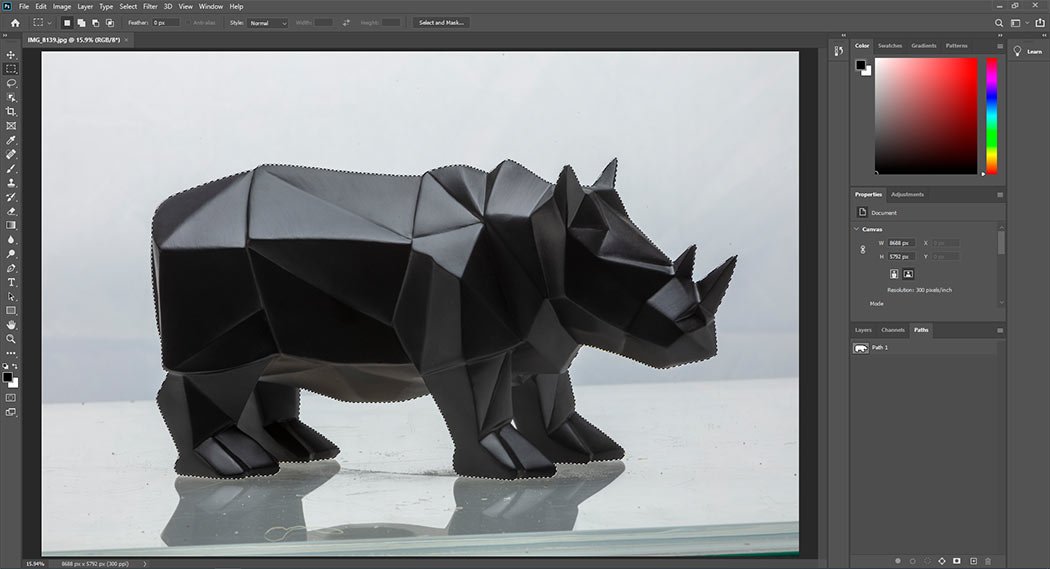
Select the pen tool from the toolbox.
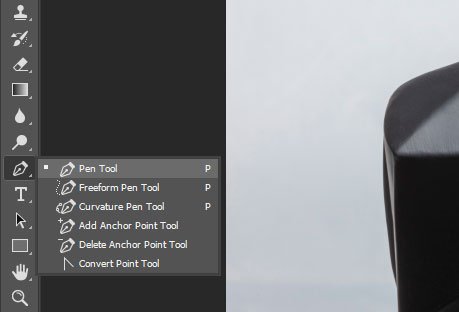
Make sure that the pen tool is on path mode.

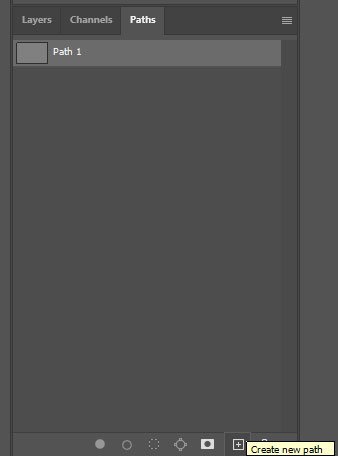
Open path layer from menu box Windows > Paths.
Create a new path layer. The default path layer name should 'Path 1.'
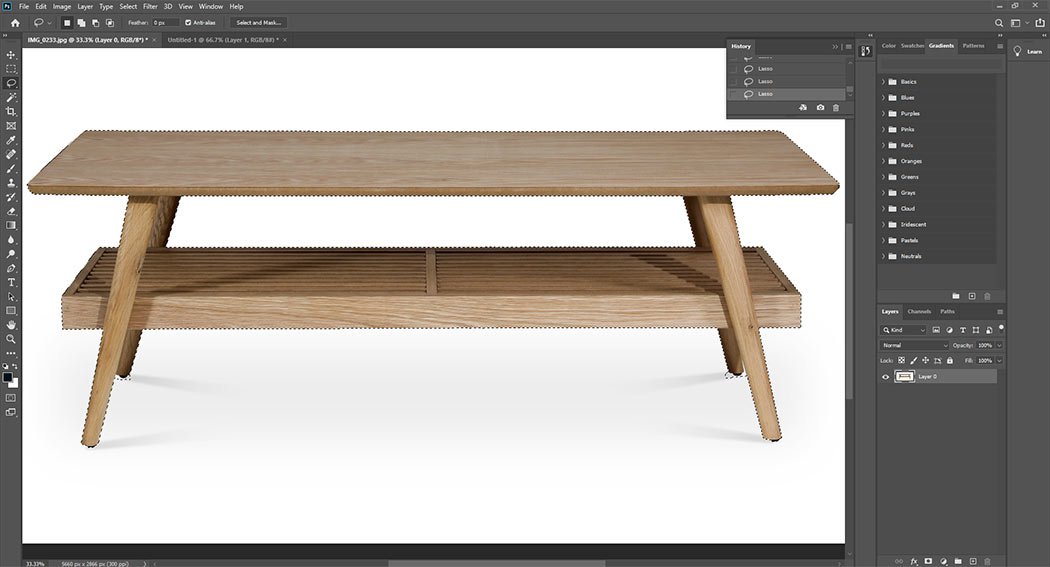
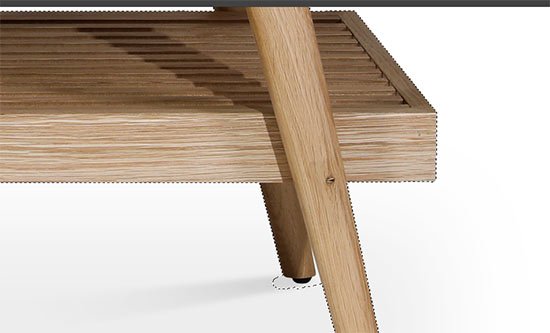
Start creating the selection around the subject. The clipping path will complete to the same anchor point from where you started.
If you are new, it might be difficult for you to draw a vector line with the pen tool.
We are showing this method first because this is the best option for quality photo cut out.
If you are going to use your image for professional purposes, you should know this technique.
See the first video carefully to learn how to how to draw the selection with the pen tool.

Step-04: Erase background
Let's select path: Hold Ctrl(windows)/Command(mac) > click on 'Path 1'
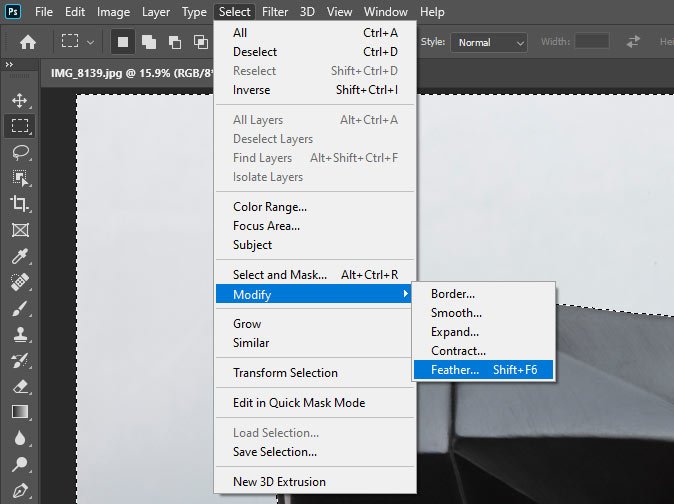
Inverse the selection by pressing Ctrl > Shift > I on Windows platform and Shit > Command > I on Mac. You can also inverse from the menu bar by selecting Select > Inverse.
Apply moderate feather(0.1-0.5) for smooth cut by choosing Select > Modify > Feather.
Now, make the background by pressing Backspace(Windows) or DELETE(Mac) key on your keyboard. Congratulations, we have made background transparent successfully.
Step-05: Save the image in transparent format
Finally, save the image in a transparent format. We always prefer PNG format for transparent background.
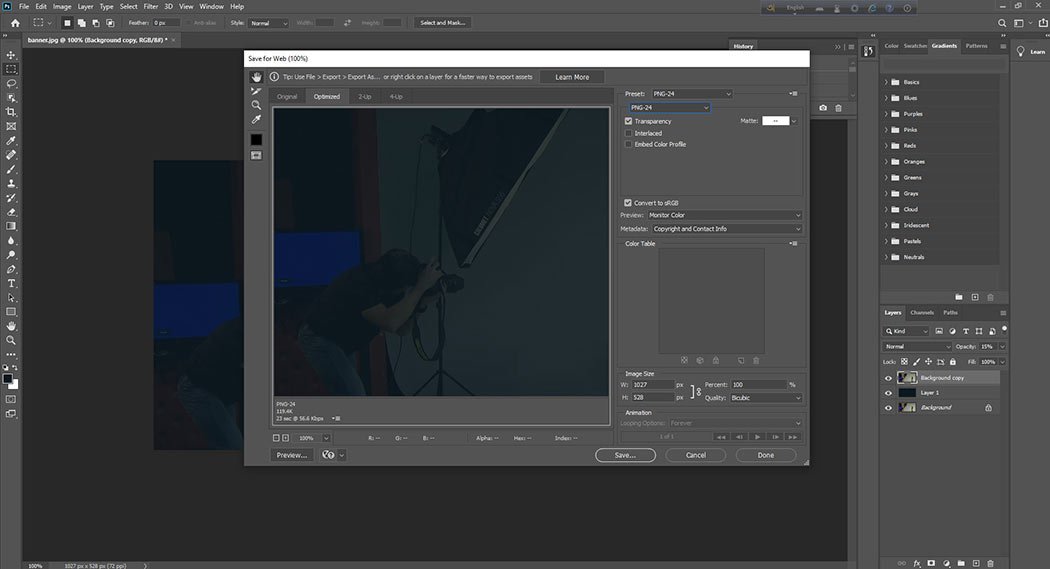
If you are going to use the image on the website, save it in a web-ready PNG-24 format. To export, the image got to File > Save for Web.
How to Make White Background Transparent in Photoshop
Since, we have already learned how to make background transparent in Photoshop, now we will show you how to make white background transparent in Photoshop.
It is comparatively easy. You can do it with the least effort if you have Photoshop on your computer.
You can delete the white background and make it transparent with just a few steps.
We are showing the steps with Photoshop CC-2019 version.
Import File in Photoshop
At first, run the Photoshop program on your computer. Import white background image from File > Open option.
Unlock Layer
The next step is to unlock the default background layer. To do so, please launch the layer panel from Window > Layer.
Now, double click on the 'Background' layer. A popup page will appear. It will suggest you set the layer name.
Keep the default layer named 'Layer 0'.
Make Quick Selection
In this step, you have to make the selection of your subject.
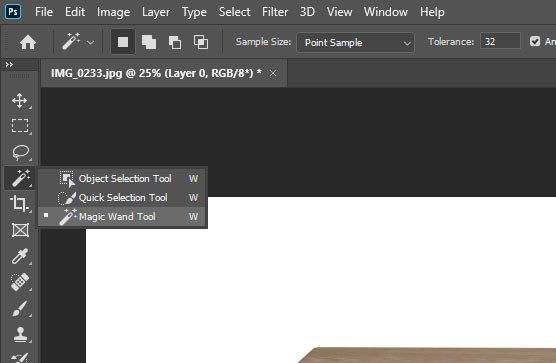
We will use the 'Magic Wand Tool' for the quick selection. It is the most accessible tool in Photoshop for making any selection.
Select the tool from the left side toolbox.
Click on 'Select Subject' from the top menu bar. Photoshop would create the selection automatically regardless if it's white or other backgrounds.
Photoshop has used its latest artificial intelligence technology to detect the subject.
If the selection is not accurate, you have to do it manually. Magic Wand tools would be convenient in this regard.
You can modify the selection with this tool to include(Shift+click) or exclude(Alt+click) any part of the background or the subject.
If the subject contains any hole, make sure of selecting that area as well.
Delete Background
Since the selection is perfect by this time, you can delete the background. Inverse the selection from Select > Inverse or using keyboard short cut Shift + Ctrl + I on Windows and Shift + Command + I on Mac, respectively.
Now, delete the white background by pressing Backspace(Windows) or Delete(Mac) key on your keyboard.
The white background is gone, and the gray-white transparent background is there.
Save in Transparent File Format
The last step is to save the image in a suitable transparent format. If you are going to use the file for general purpose, keep it in PNG format from File > Save As.
For web use, you have to save the image for web-ready PNG-24 format. You can do it by typing Shift + Alt + Ctrl + W(Shift + Option + Command + W on Mac) on your keyboard or going to File > Export > Export As.... from the top drop-down menu option.
In the earlier version of Photoshop, you can save the files for web format by pressing Ctrl + Shift + Alt + S (Shift + Option + Command + S) or selecting File > Save for Web from the menu bar.
How to Make an Image Transparent in Photoshop
Creating a transparent image in Photoshop serves different graphic requirements.
The technique is compelling for creating a smart banner for web development.
We also need to make an image transparent partially to add transparent glass effect.
Today we will show you how to make image transparent for creating a website banner and editing glass images like sunglasses.
Make Photo Transparent for Smart Banner

Step -01: Open image in Photoshop
At first, open your Photoshop program on your computer. Open the desired file from File > Open menu.
Open layer plate from Windows > Layers
Step -02: Arrange Photoshop Layer
Arrange the layer according to the requirement to create an image transparent.
We always keep the original image untouched because you may need to use the original image in the future.
Our editing option will enable you to export the original image from the PSD file without any difficulty.
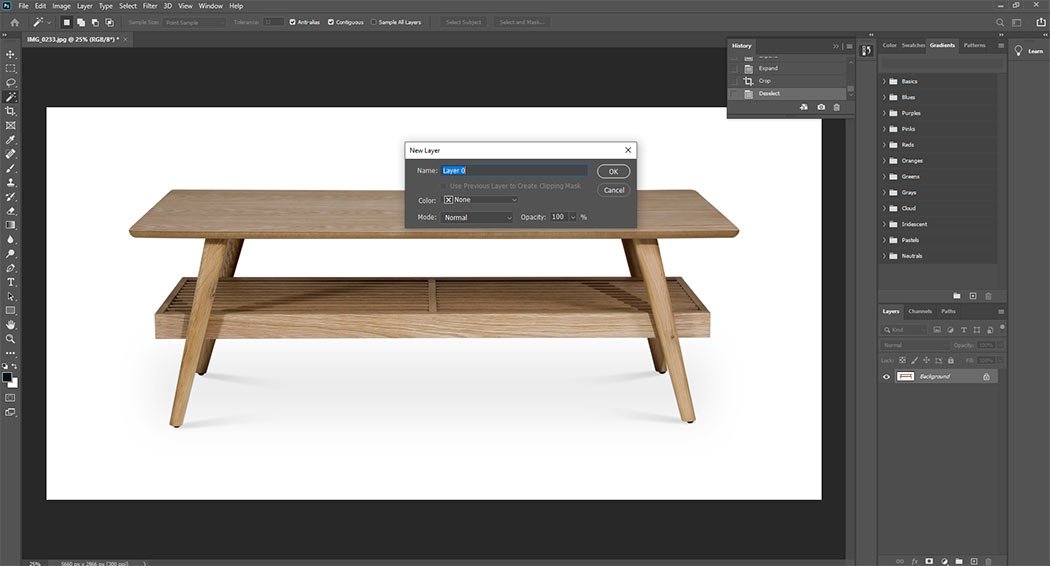
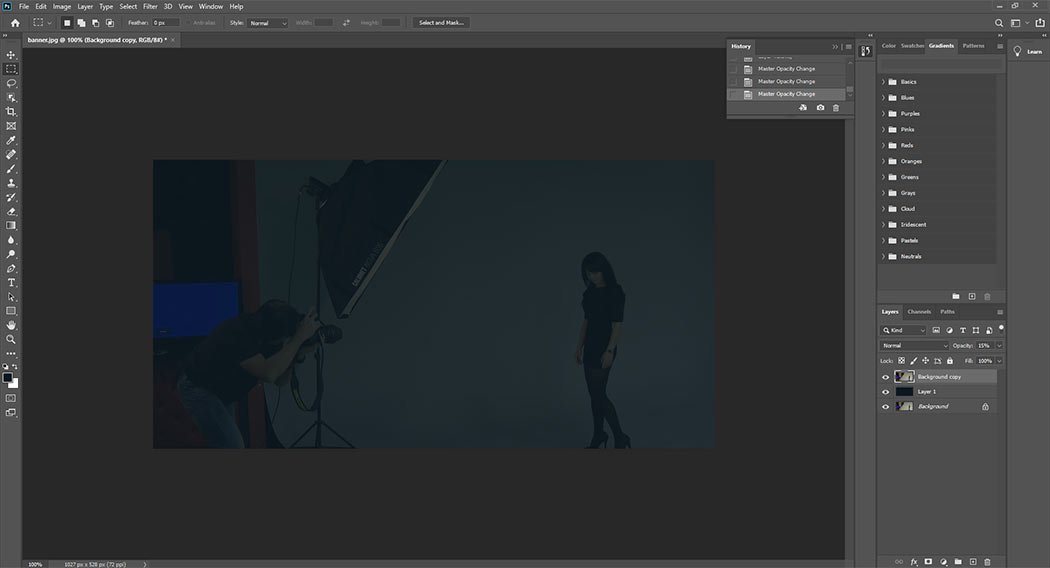
So, copy the background layer by clicking the right button of your mouse on the 'Background' layer.
Now, work on the copied 'Background' layer and turn off the original layer.
Take a blank new layer below the 'Background copy' layer. Apply any solid color on the empty layer.
You may choose any color to create the banner effect. We would use a dark blue to composite the banner.
Step -03: Apply Transparency
In this step, you have to make the image transparent to create the effect.
You can make the 'Background copy' layer transparent as much as you need to get the desired result.
Adjust image transparency with the opacity value of the layer.
While 0% opacity means completely transparent, 100% opacity stands for no transparency.
Select the opacity level to make photo transparent at your desired level.
Step -04: Save for Web
Finally, you have to save the image for web-ready format File > Save for Web... This type of banner is trendy for web design and development.
You can create your image transparent with this simple Photoshop heck.
How to Make a Logo Transparent in Photoshop
If you are branding your business with different types of promotional activities, It is must to have your logo in transparent background.
It will allow you to place the logo anywhere you need to focus your brand name.
Normally, a logo is created in vector file.
You can easily save the logo in transparent background, if you have the vector file.
However, in case of jpg file you have to make the background transparent by removing the white background.
You can do it in different methods like:
- Using Magic Wand Tool
- Color Separation Technique
- Background Eraser Tool
- Magnetic Lasso Tool
Today, we will show you how you can make a logo transparent in the easiest method using magic wand tool.
Step One: Import Logo File in Photoshop:
Go to File > Open and brows your logo file. Select the file and hit Open to import it in Photoshop.
If your logo is in .ai format make sure of selecting proper setting in the pop-up dialogue box accordingly while opening the file.
- Crop to: Bound Box
- Check Constrain Proportion
- Mode: RGB Color
Step Two: Create Selection & Make Logo Background Transparent
If you are working with vector file, your logo is already in transparent background.
So, you do not need to make it transparent any more.
Just skip this step and save the file in transparent format following the below step.
Choose Magic Wand Tool from the tool box.
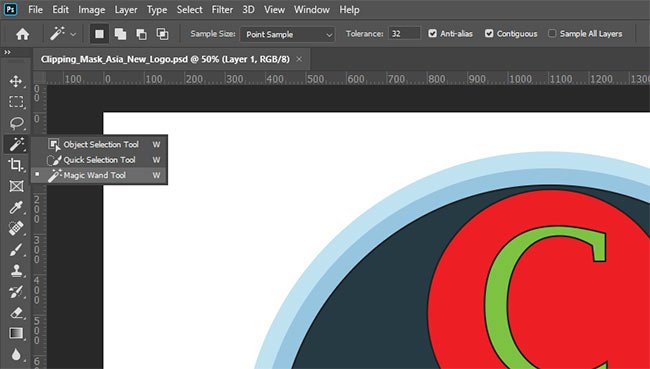
Simply click on the white canvas of your logo image to create the selection.
If you need to select any other part like the inside area of a logo, hold the Shift key and click on that part to include it in the selection.
Once the selection is done, apply moderate feather (0.1 to 0.5) from Select>Modify>Feather.
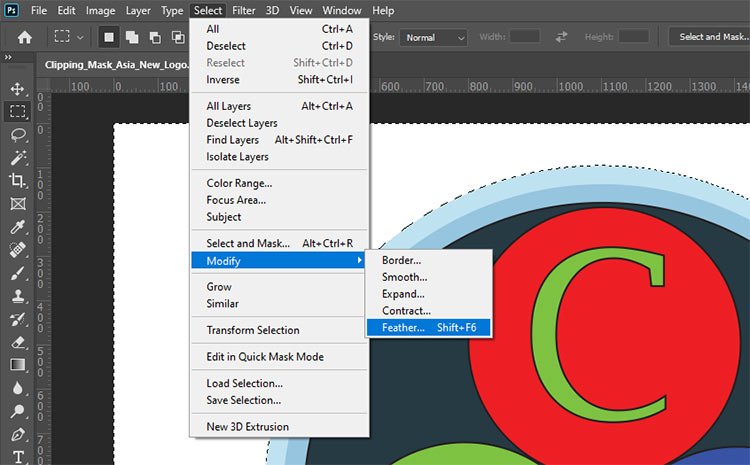
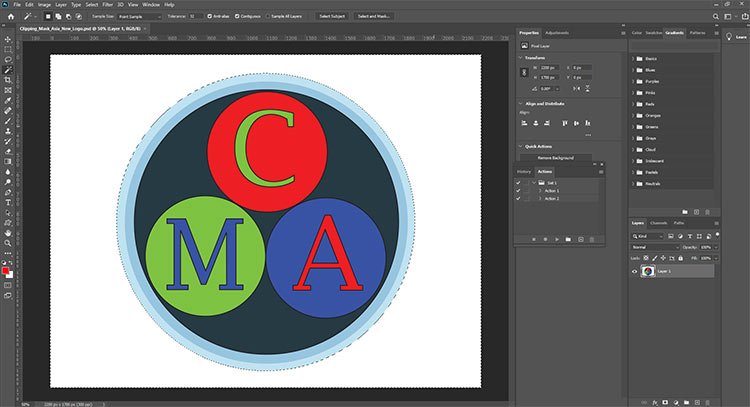
Now, delete the background by pressing Backspace (on Windows) or DELETE (on Mac). The white background should be deleted and the logo should be on transparent background like the below one.
Step Three: Save Logo in PNG Transparent Background
Saving logo in transparent format is same to that of a product image which has been shown earlier.
Follow the instruction from 'Save in Transparent File Format'(hyperlink).
The only difference you will encounter while saving the logo is the file size.
The files size of transparent logo will be smaller than that of a product image.
The reason behind it is the color combination. A logo file normally has 2-3 three colors, whereas the product image consists of numerous colors.