Creating custom cloud brush in Photoshop is not a bit deal. You can generate your desired cloud brush in jus a few seconds.
You can create the best brush by yourself as you know your purpose best.
We will be very happy, if you learn anything new from this Tutorial.
Video Tutorial on Photoshop Custom Cloud Brush Creation
13 Easy Steps of Creating Cloud Brush in Photoshop
Here we have explained the steps with screenshot for your convenience. Hope will make things easier.
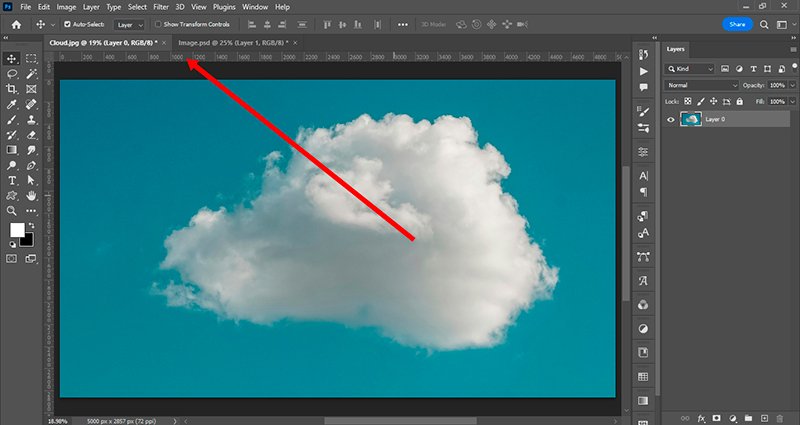
Step 1:
Open the cloud image and the other image on which you want to add clouds in Photoshop
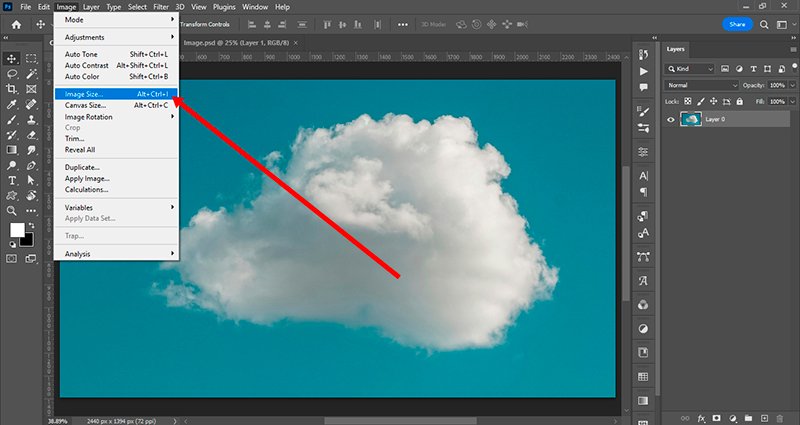
Step 2:
Open cloud image, Select 'Image' > 'Image size'

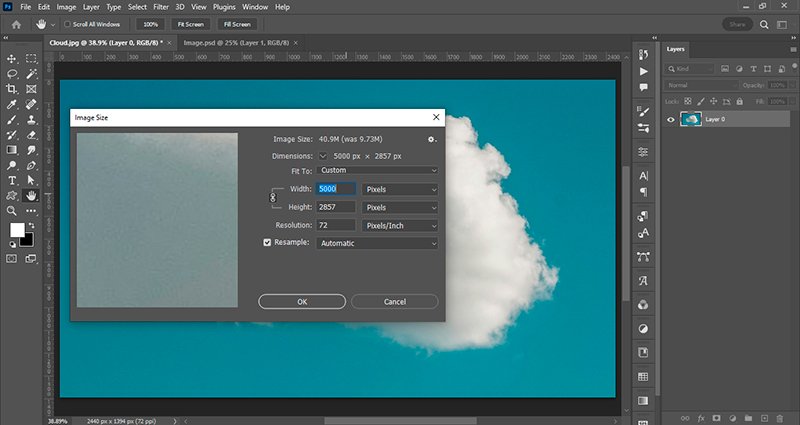
Step 3:
Now set the width to 5000 pixels and press Ok. In latest Photoshop version, the maximum brush size is 5000 pixels so you can set it to 5000 pixels. In older versions, it is 2500 pixels.
Step 4:
Go to 'Image' > 'Adjustments' > 'Black and White'
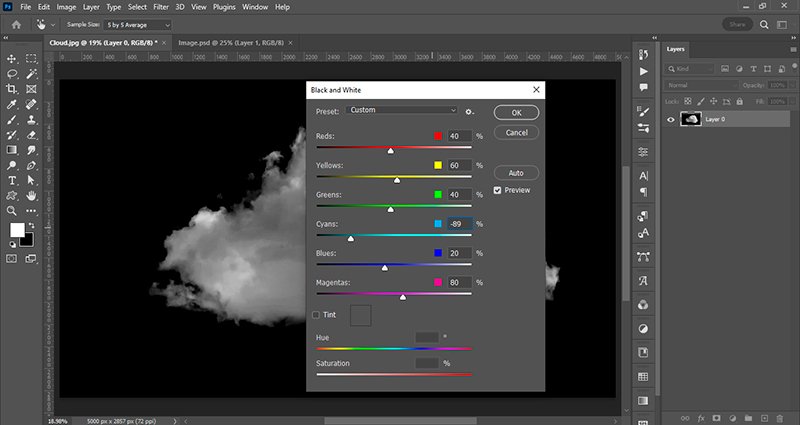
Step 5:
Set the value of 'Cyans' and 'Blues' according to your cloud image and press 'ok'

Step 6:
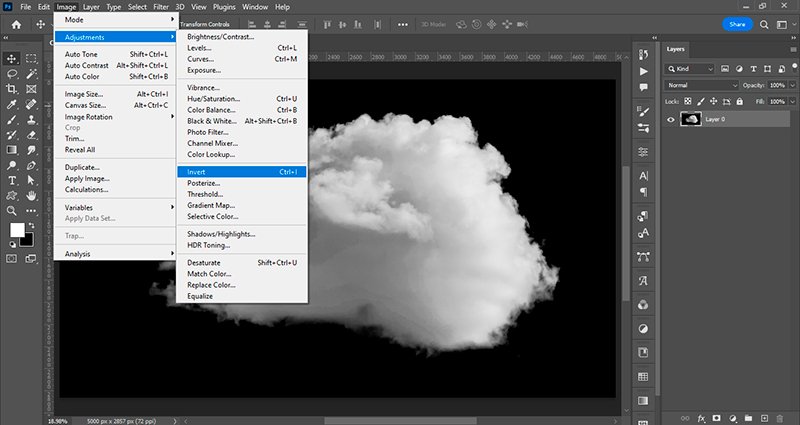
Go to 'Image' > 'Adjustments' > 'Invert'
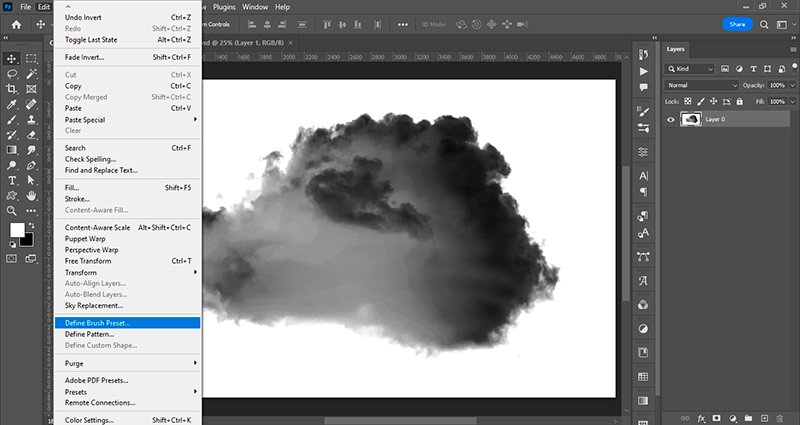
Step 7:
Go to 'Edit' > 'Define brush preset'
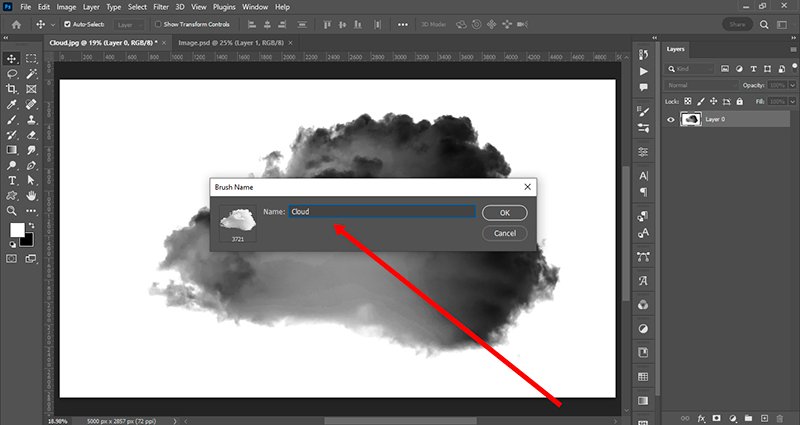
Step 8:
Name your brush
Step 9:
Your brush is ready to use
Step 10:
Open the other image to use you brush
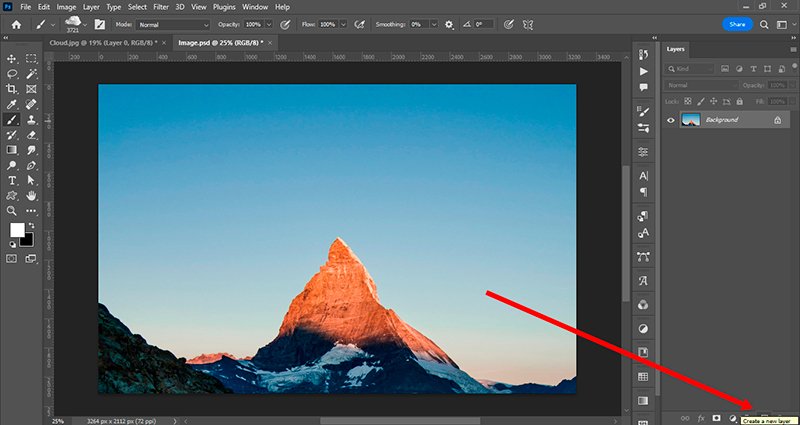
Step 11:
Create a new layer
Step 12:
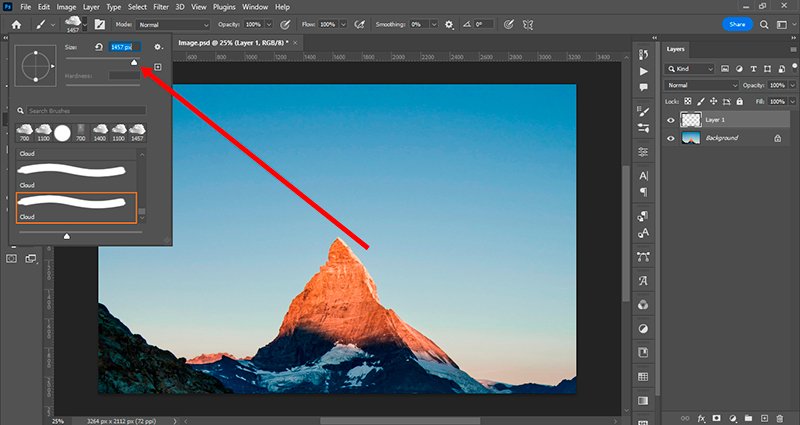
Set your brush size accordingly. You can also press these buttons '[' , ']' to increase or reduce your brush size.
Step 13:
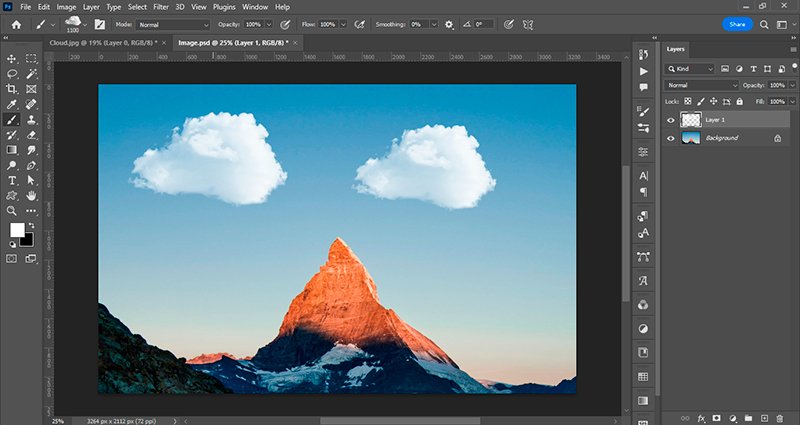
Now use it on your image.
You may have a look on other Photoshop tutorials:

Asha is working as a Creative Director at Clipping Mask Asia. She has completed her Graduation from the University of Dhaka inFilm and Television Studies. She has vast knowledge in Photography, Videography, Video Editing, 3D Modeling, Rendering and Animation. She loves to explore the creative world with her academic knowledge, experience and creative mind. She writes creative blogs on design, illustration and editing for renowned brands like Clipping Mask Asia.