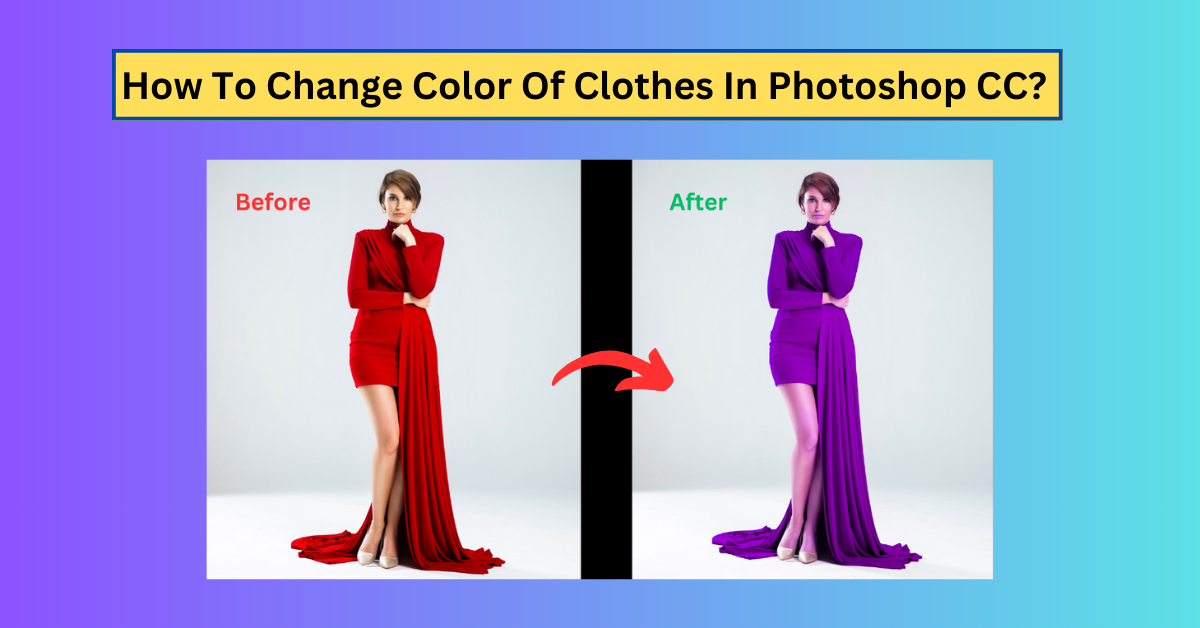
Do you want to learn about how to change color of clothes in Photoshop?
Sometimes it can be hard to do this because clothes have many folds and shadows.
When you change the color of clothes, you need to make sure they look natural and realistic.
But don't worry, we will show you the simple steps on how to do it easily.
The way you change the color will depend on what color the clothes are and how they look in the picture.
Here, you can use different ways for different colors of clothes.
Therefore, we will show you an easy way about how to change color of clothes in Photoshop CC which anyone can do.
So, keep reading till the end of this tutorial. Happy Learning!
How to Change Color of Clothes in Photoshop? [Step-By-Step Process]
In this Photoshop lesson, we’re going to discuss how to change color of clothes in Photoshop cc.
Also, we will mention the step-by-step guidelines that can help you change colors without making them look weird.
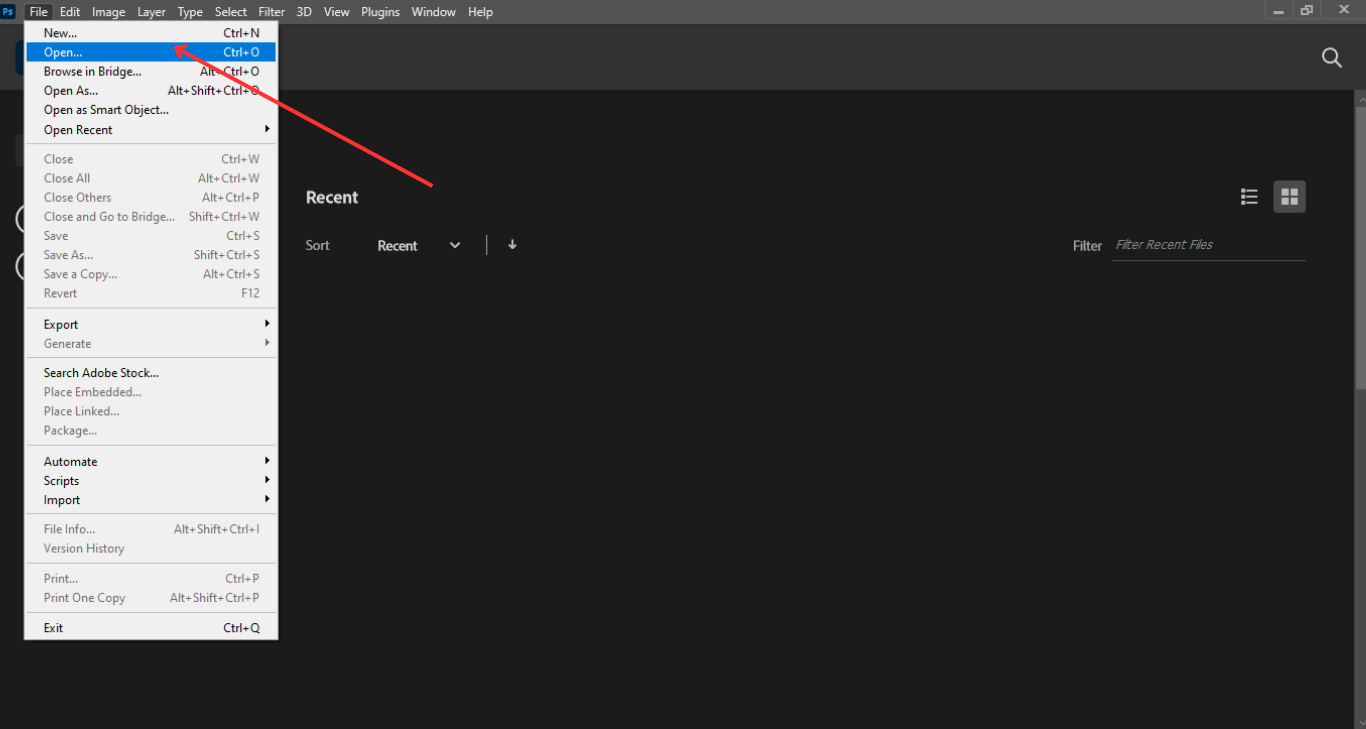
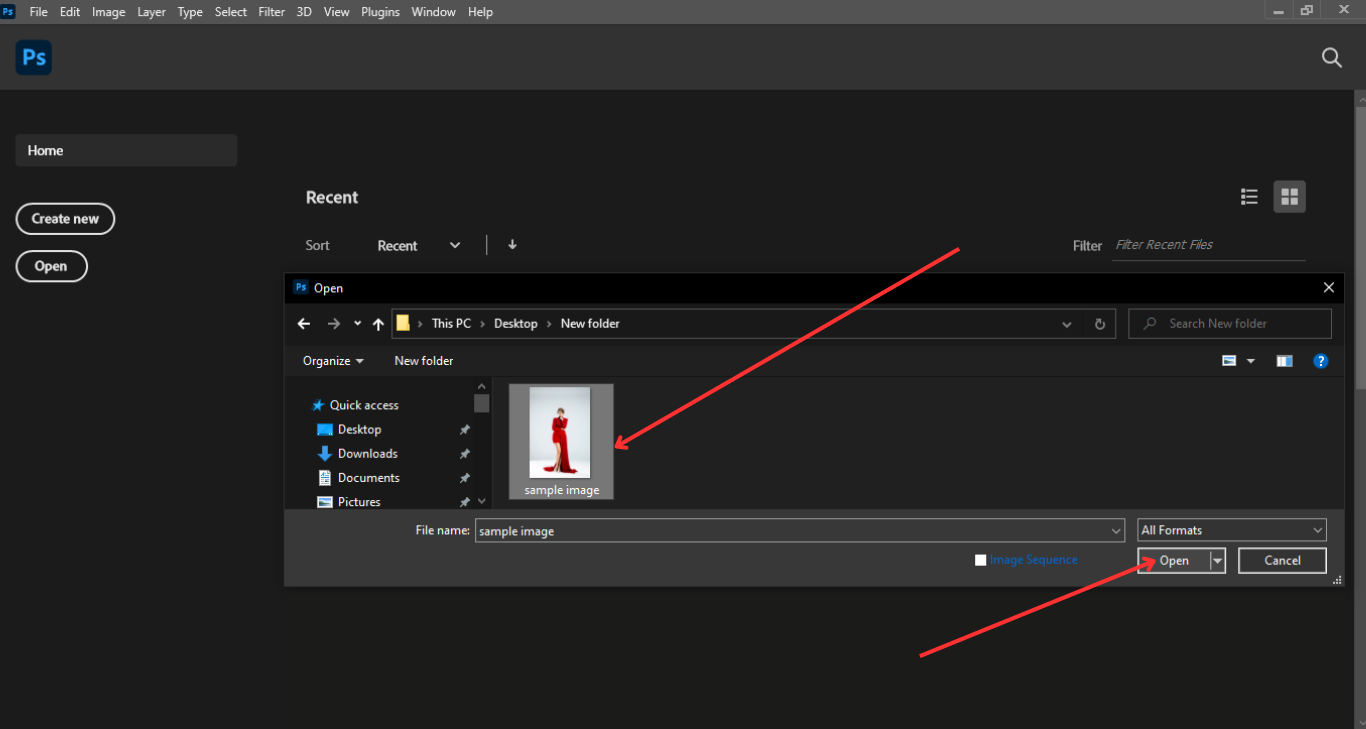
Step#1: Open the image file on your Photoshop application:
First, open Photoshop and bring your photo into it.
You can do this by clicking Open or by making a new layer and putting your photo on it.
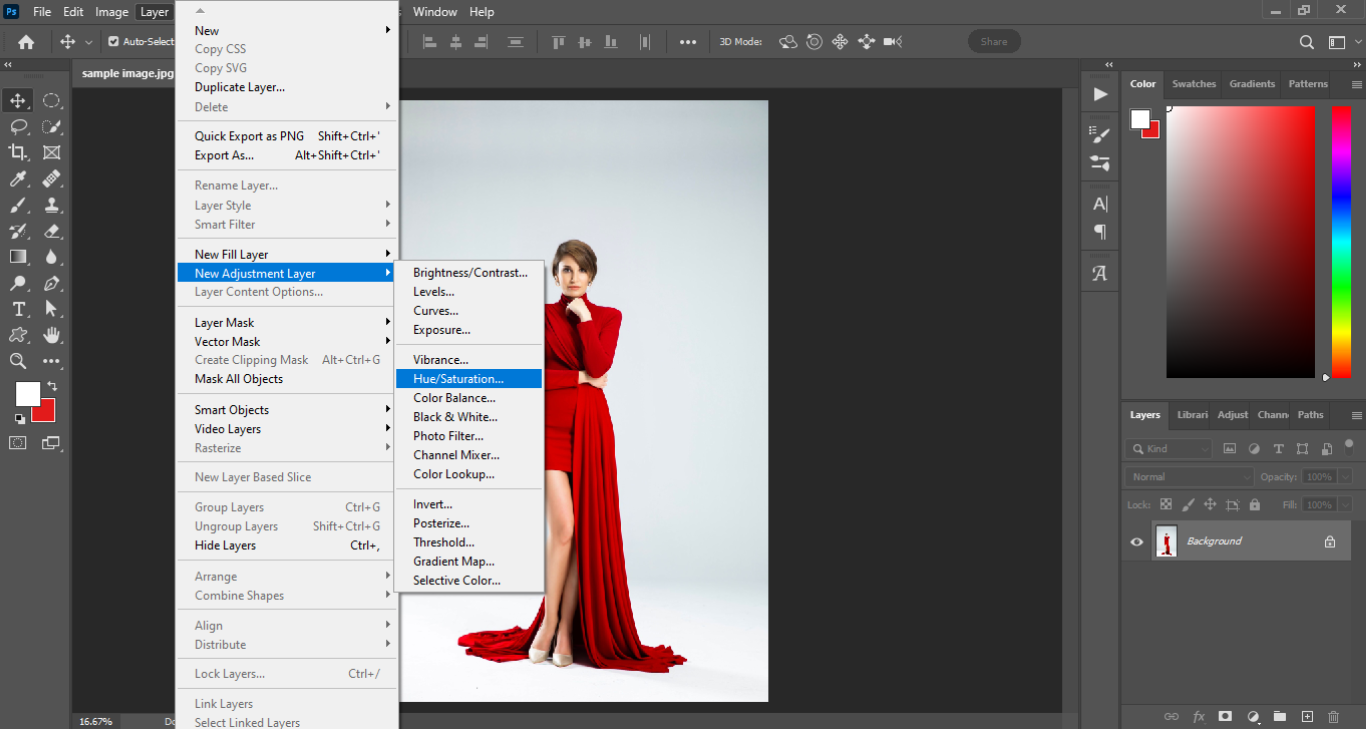
Step#2: Make a New Adjustment Layer
Next, click “Layer” > “New Adjustment Layer” > “Hue/Saturation.” Or, you can click the icon that looks like a circle with colors in the Adjustments panel.
This will make a new layer that can change the colors of your photo.
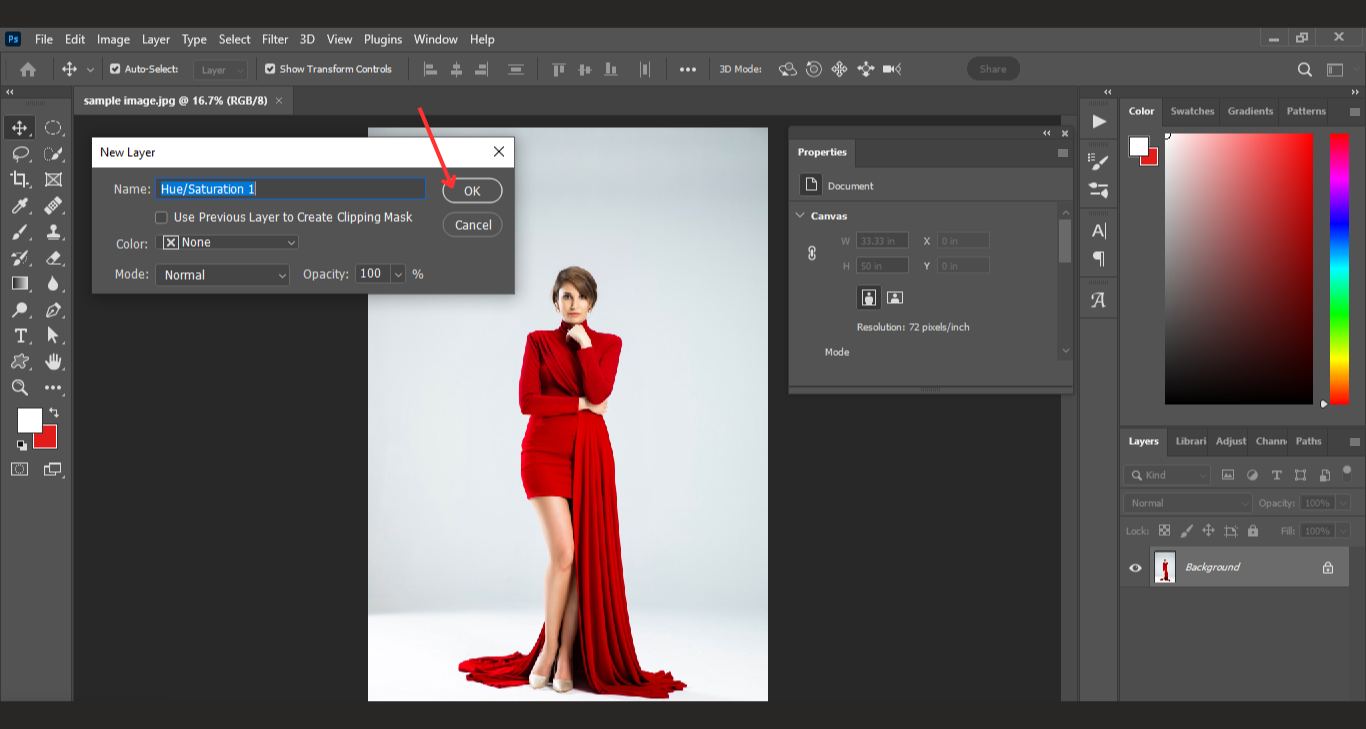
Step#3: Give a Name to the New Layer
When you make a new layer with the menu, you can also give it a name that you like.
This will help you find it easily on the Layers panel.
After you type the name, click “OK.”
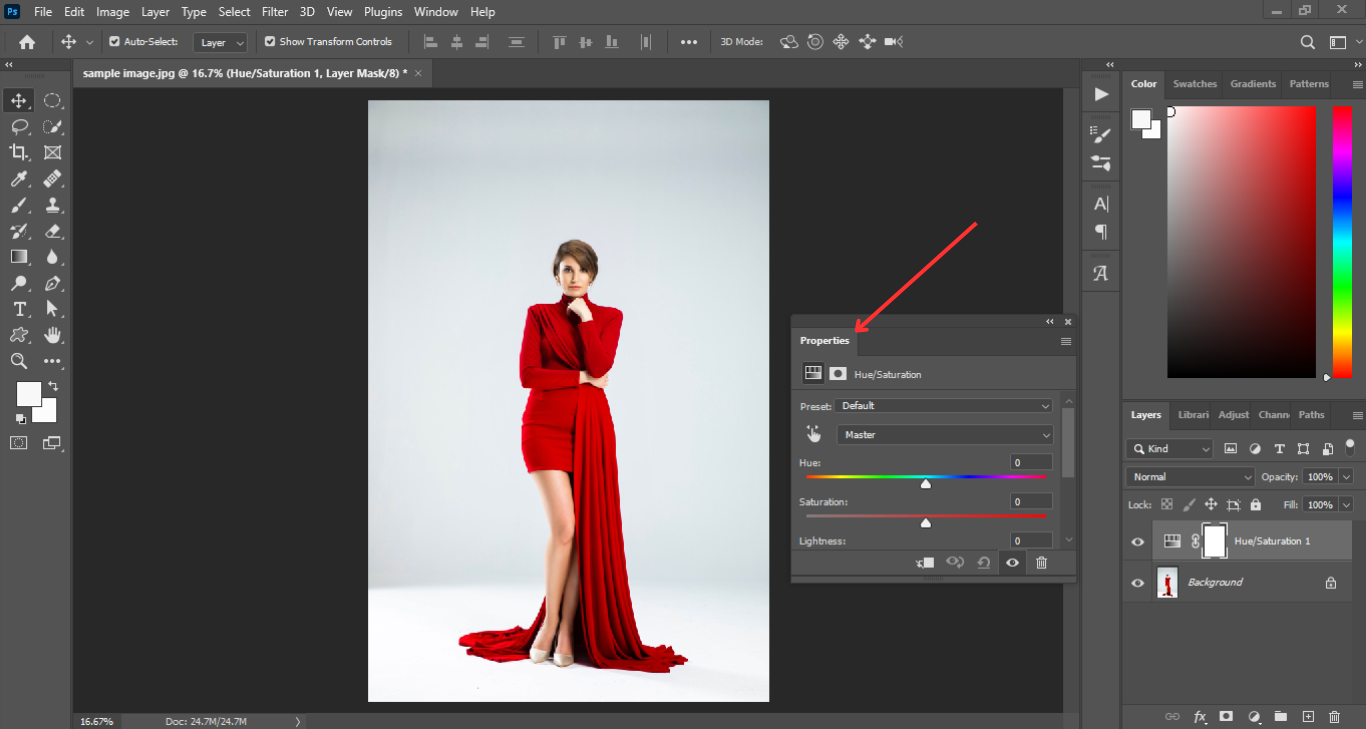
Step#4: Open the Window option and drive to the Properties Panel
Before you change the colors of your clothes, you should make sure they look smooth and nice.
You can use Photoshop to remove any wrinkles or folds on your clothes.
This will make them look better when you change color of clothing in Photoshop.
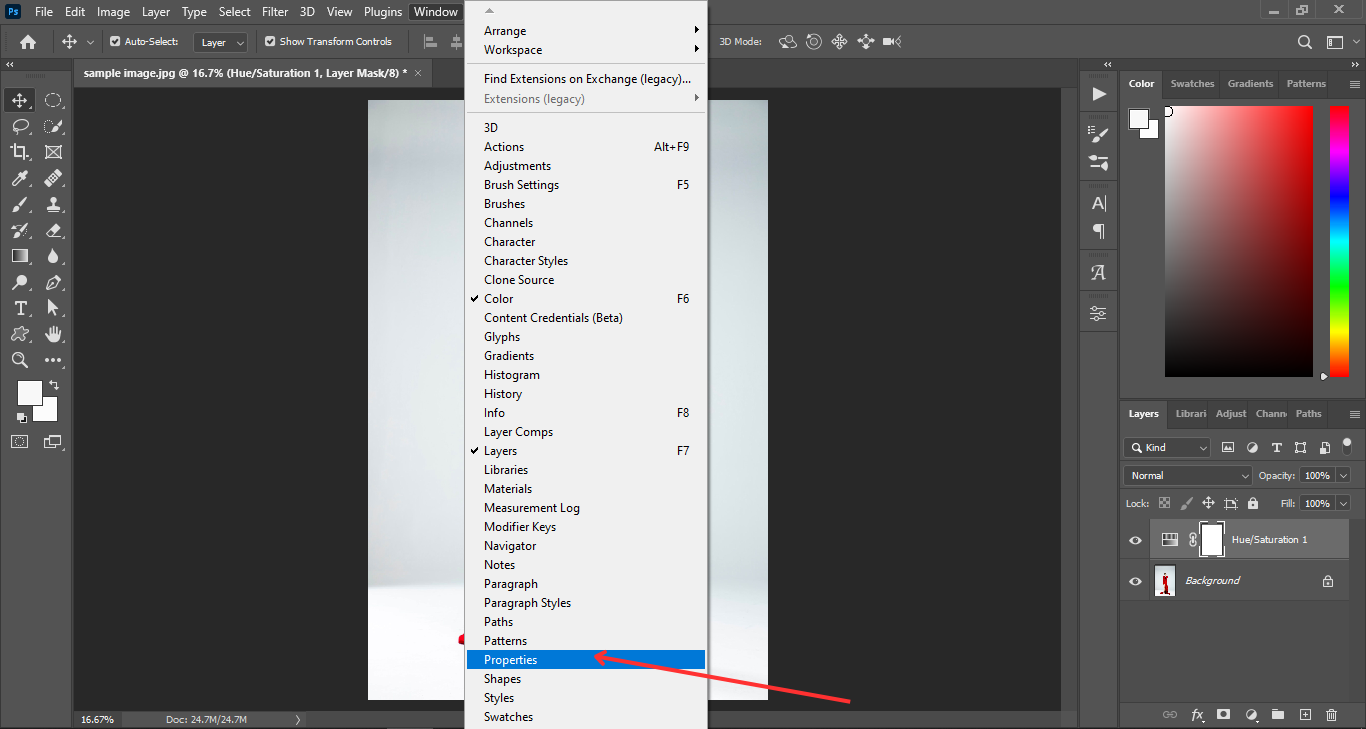
To change clothes color in Photoshop, you need to go to the Properties panel.
It is above the Layers panel.
If you don't see it, you need to open “Window” and then select “Properties” from the drop-down menu.
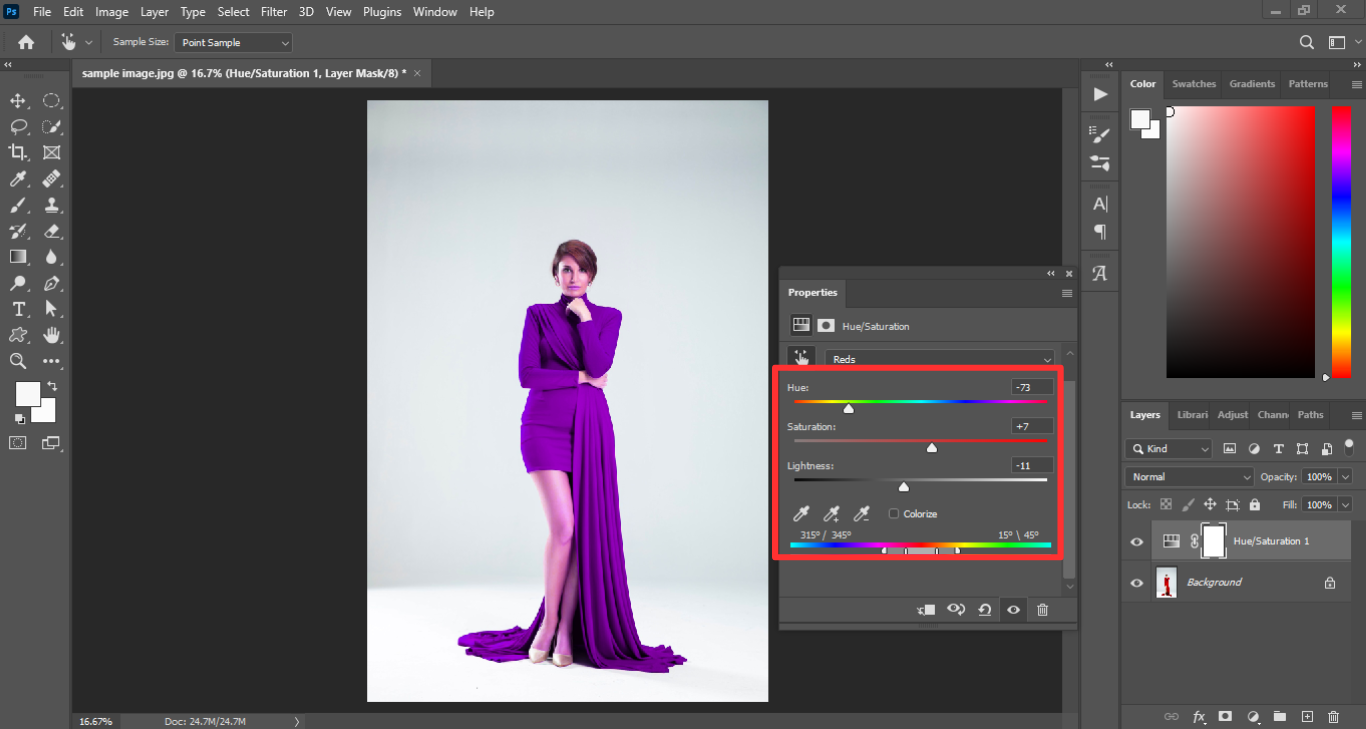
Step#5: Pick a Color Channel
Now you are ready to change clothes color Photoshop.
Click on the color channel to see a list of options.
The Master option is already selected for you.
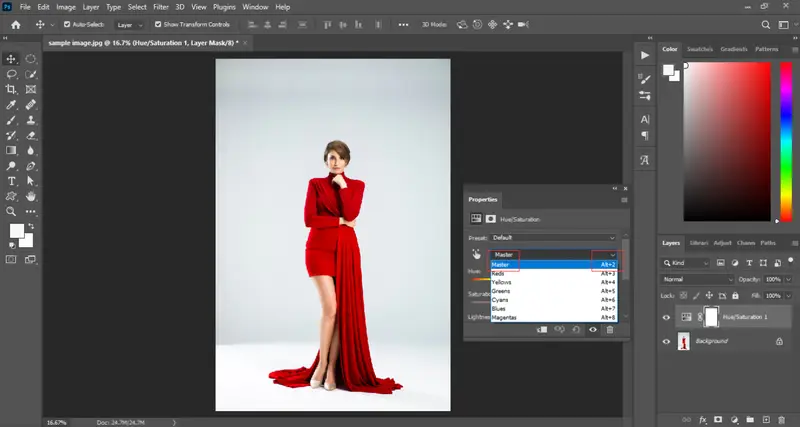
To get the best result when you change the color of something in Photoshop CC, click on the icon that has a finger and two arrows.
Then click on the color on the photo that you want to change.
We’ve clicked on the dress in the sample image which is shown below.
![]()
![]()
Step#6: Move to the Sliders to Change the dress’s Color
When you pick a color, the whole group of colors will change automatically.
You may skip this step if you’ve selected only the clothes that you wish to change.
If not, you need to move the sliders for Hue, Saturation, and Lightness until you get your desired color.
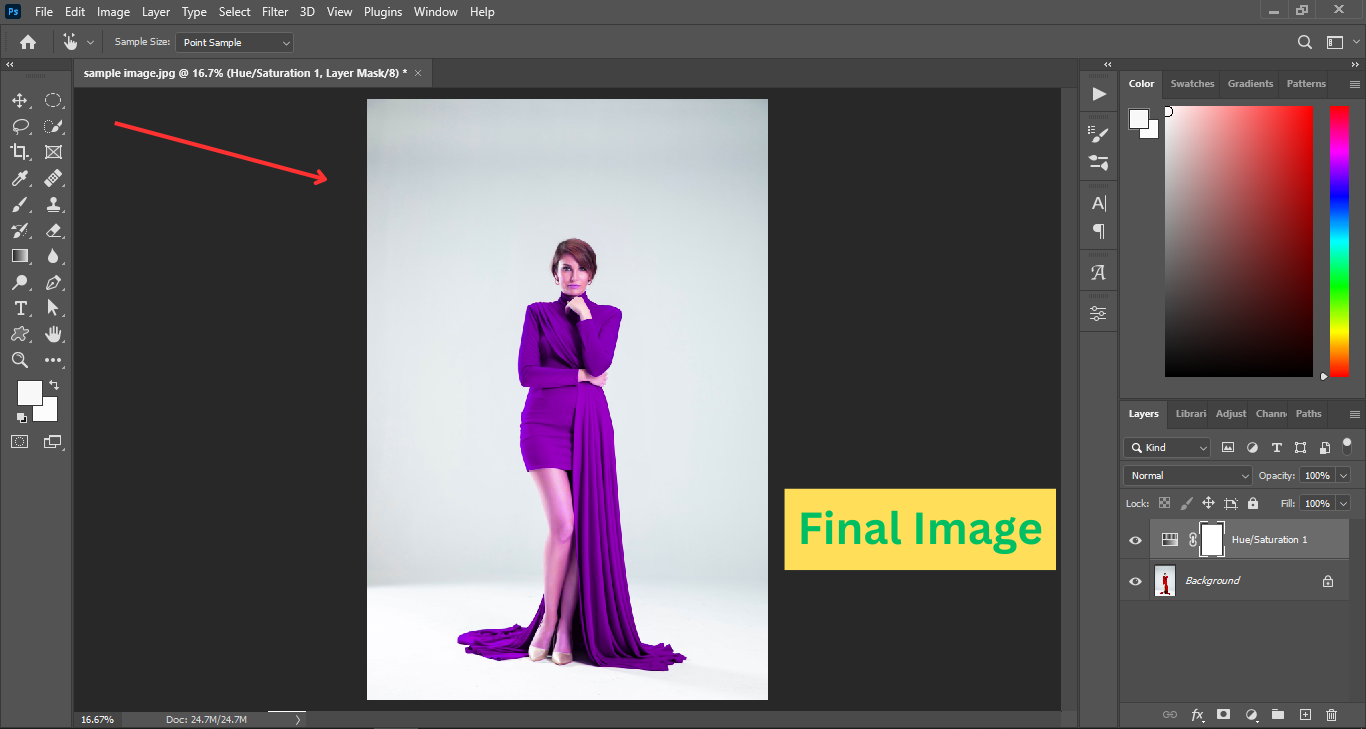
Step#7: Done and See the final output
You did it! Now you’ve learned the tricks of changing color of clothes in Photoshop.
You can try different colors if you like.
Now, see the final image:
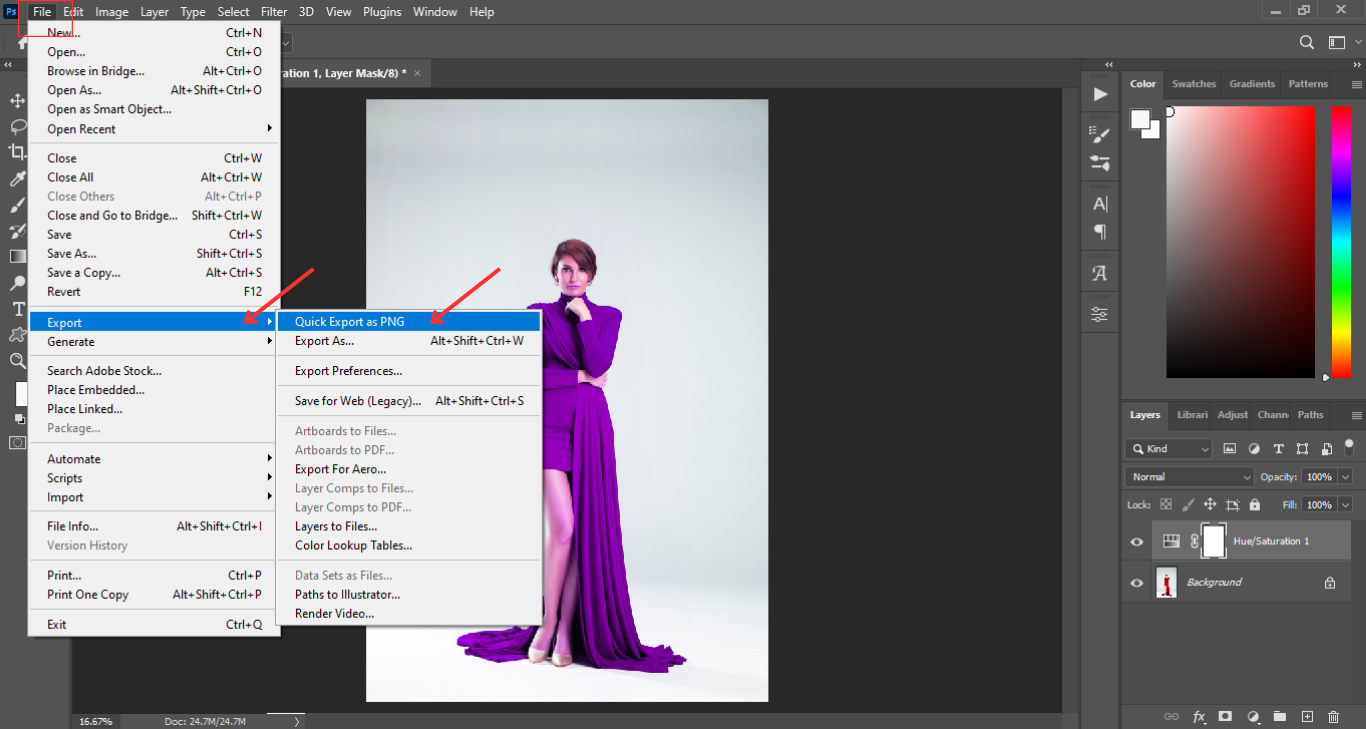
Step#8: Save your image file as PNG:
Now, click on the “file” tab. Select “Export” and then choose “Quick Export as PNG” from the drop-down menu. You can also export gif, jpeg, psd, tiff etc. from save as menu.
See the below image to understand easily.
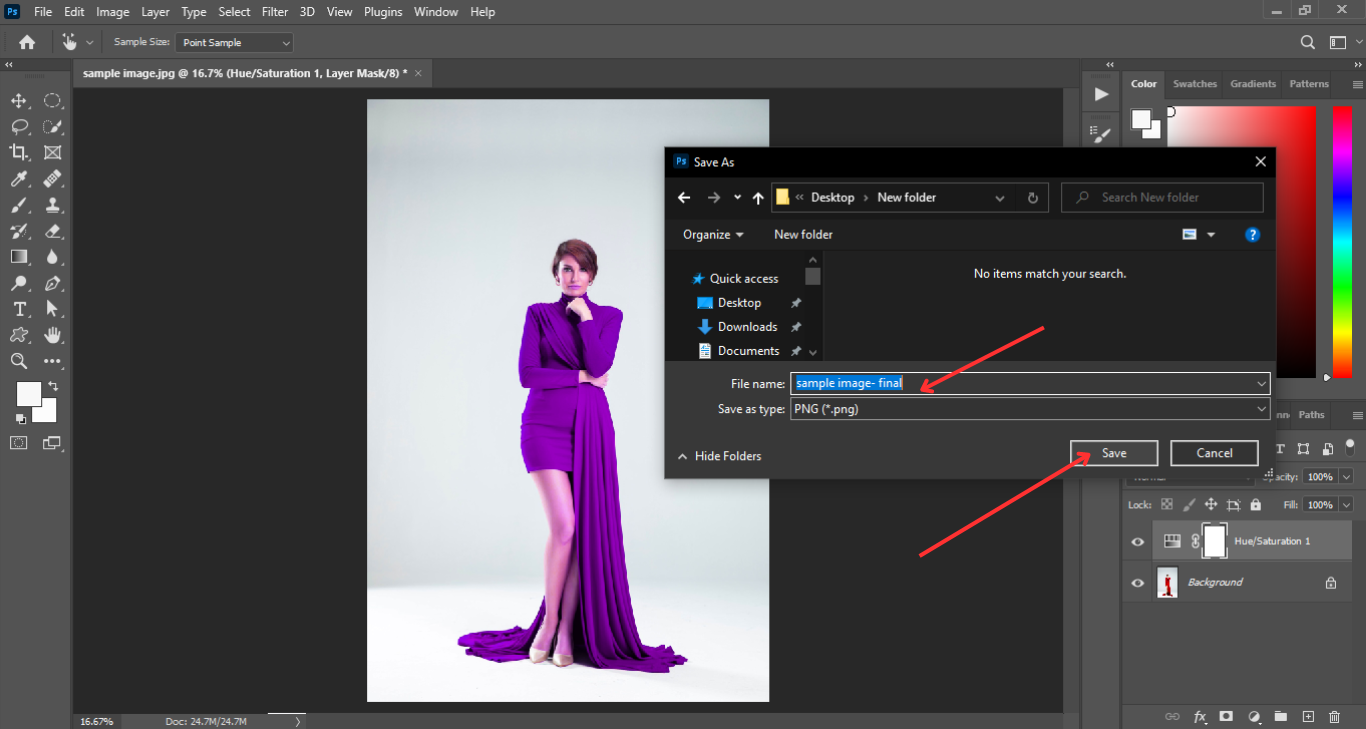
Then, rename or give your image file name.
After that, click on the “save” button. Done!
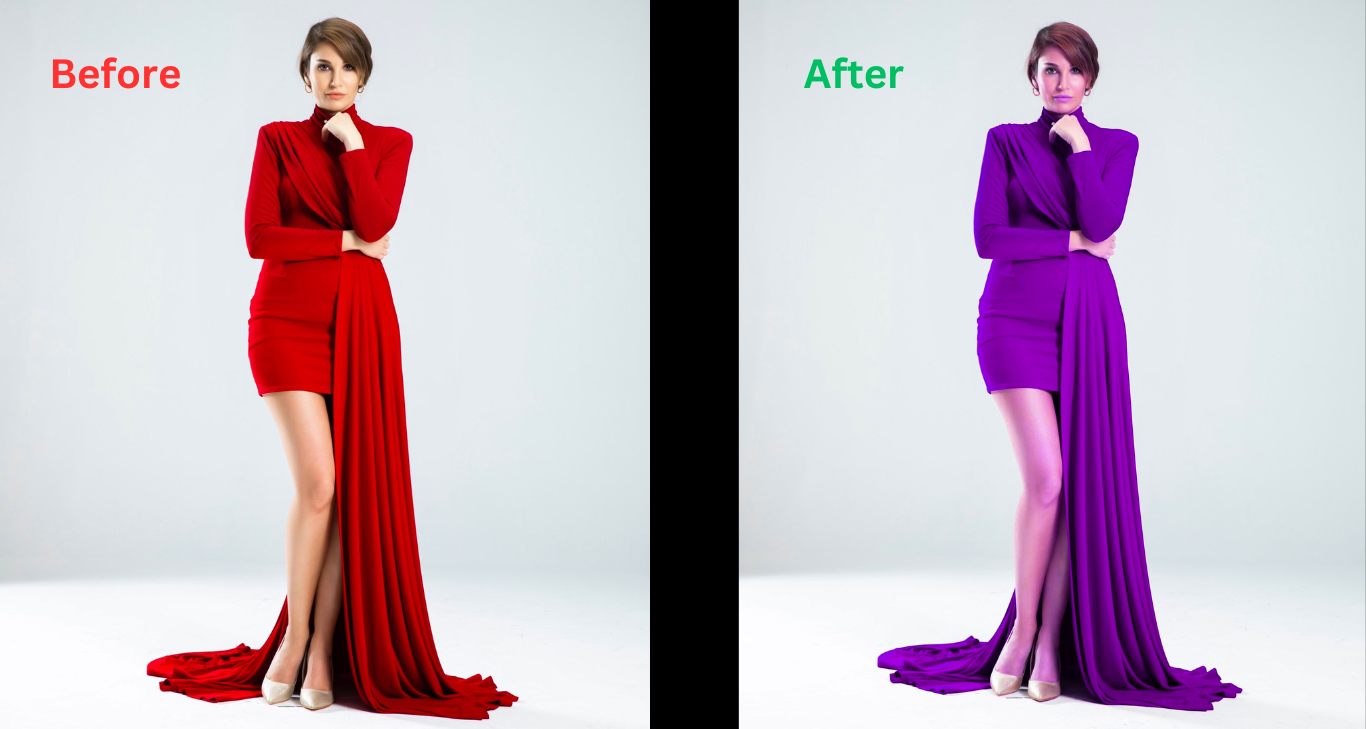
Finally, look at the before and after images:
Final Words About How To Change Color Of Clothes In Photoshop:
After reading this blog post, you’ve learned the key points about how to change color of clothes in Photoshop CC.
Also, you’ve successfully modified your image’s clothing color with your needs.
If you still need some help with this, don't be so worried.
You can ask some photo editing experts from CMA, who can professionally edit your photos while you are learning more things at the same time. So, contact us today!
Did you enjoy this Photoshop lesson on changing colors in Photoshop?
If you did, you may also like our other Photoshop tutorials or blogs that show you how to do cool things in Photoshop CC.
Have any questions about this blog? Please leave a comment below. Thanks for reading!
Happy Photoshop change clothing color!!
FAQ About How to Change Color of Clothes in Photoshop:
1. What if the color of other things also changes?
You can fix this by using the masking trick in Photoshop. Just draw around the clothes that you want to change and apply a mask from the Hue/Saturation layer to them.
2. How to change color from black to white in Photoshop?
Pick out your desired color to change and then close the “Adjustment Layer” window. Click on the “mask” [white square] and then press Ctrl + I. The mask will turn black, and all your changes will be hidden.
3. How to make colors look better in Photoshop?
In the Adjustments panel, select the tool that can improve your colors.
For example, choose Levels or Curves to make them brighter or darker. Click Color Balance or Hue/Saturation, to make them warmer or cooler.
4. Do I have to use Photoshop to change colors?
No. There are other programs and apps that can do this too.
But Photoshop has more features and options, so your photos will look professional if you can use it properly.
5. What kind of picture format is the best for editing in Adobe Photoshop?
If you want to make clothes look like different colors in Photoshop CC, We suggest using JPEG pictures.
But you can also use and change TIFF or PNG pictures as well.

Asha is working as a Creative Director at Clipping Mask Asia. She has completed her Graduation from the University of Dhaka inFilm and Television Studies. She has vast knowledge in Photography, Videography, Video Editing, 3D Modeling, Rendering and Animation. She loves to explore the creative world with her academic knowledge, experience and creative mind. She writes creative blogs on design, illustration and editing for renowned brands like Clipping Mask Asia.