The gradient tool in Photoshop is one of the most effective tools to use if you want to make a seamless transition between two colors. Learn how to create a gradient in Photoshop by reading on.
You can easily generate a variety of gradients in Photoshop. A linear gradient that goes in a straight line, a radial gradient that makes a circle, and an angle gradient that shades in an anti-clockwise sweep.
Plus, a diamond gradient casts a shadow from the center to the edges of your photo. The reflected gradient makes linear gradients look the same. You can make all of these forms with the help of gradient tool.
In this blog post, I'm going to make a gradient using Photoshop CC. Next I will apply this gradient to a photo or layer. Keep reading and scrolling down to learn how to use the gradient tool Photoshop.
Happy Learning!
How To Make Gradient In Photoshop? [Tutorial For Everyone]
This tutorial will help you to create your gradient in Adobe Photoshop. Here, I've used the latest version of Photoshop CC.
Follow the below steps and keep reading!
Step#1: Selecting The Gradient Tool From the Photoshop's Toolbar:
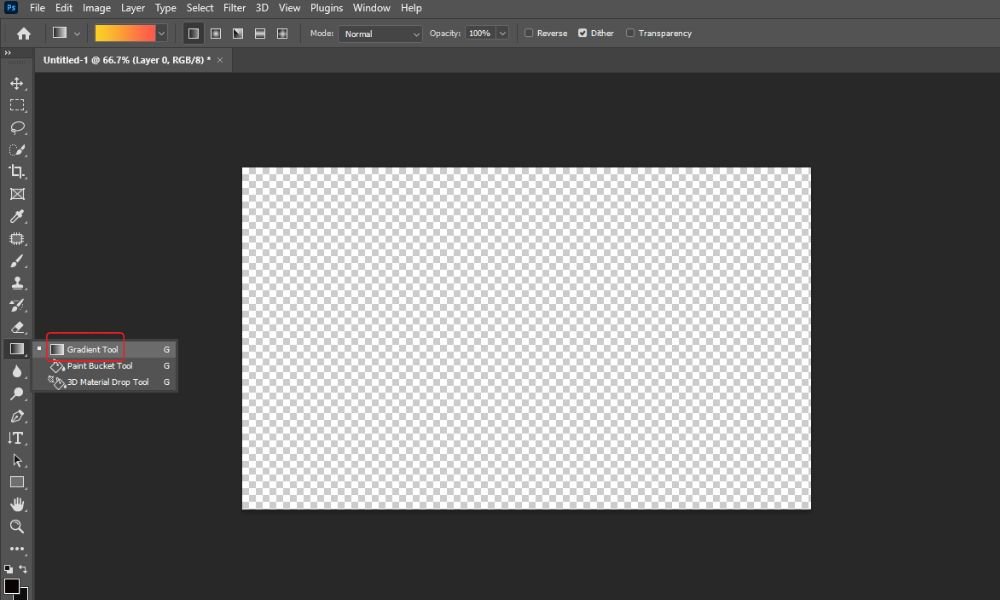
A square symbol with a gray gradient indicates the gradient tool's symbol. Right-click on the icon and hold the button down to enlarge the option if you can't see it.
Now you have to pick out the gradient tool from the drop-down menu.
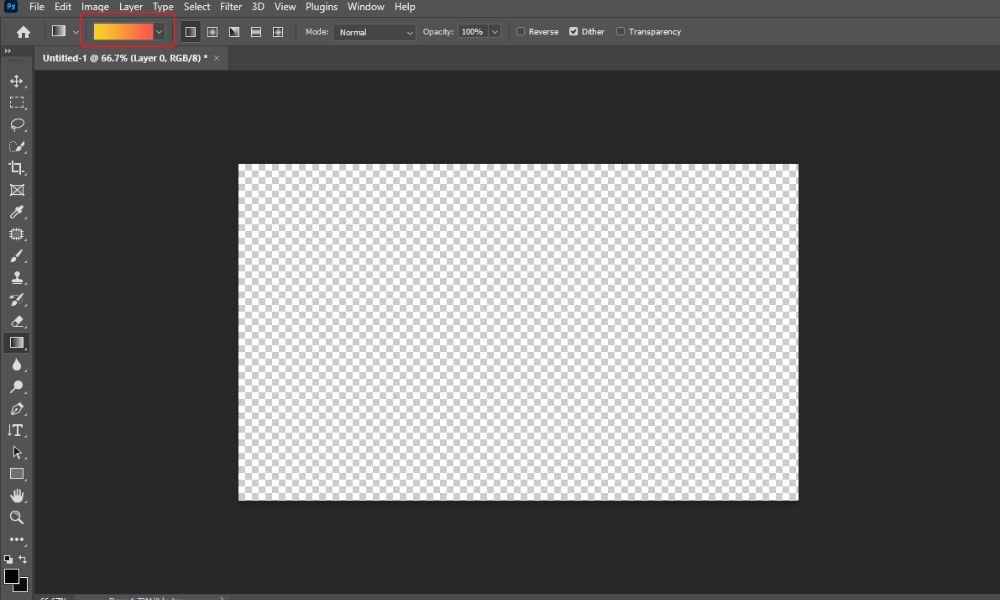
Step#2: Opening the Gradient Editor Window:
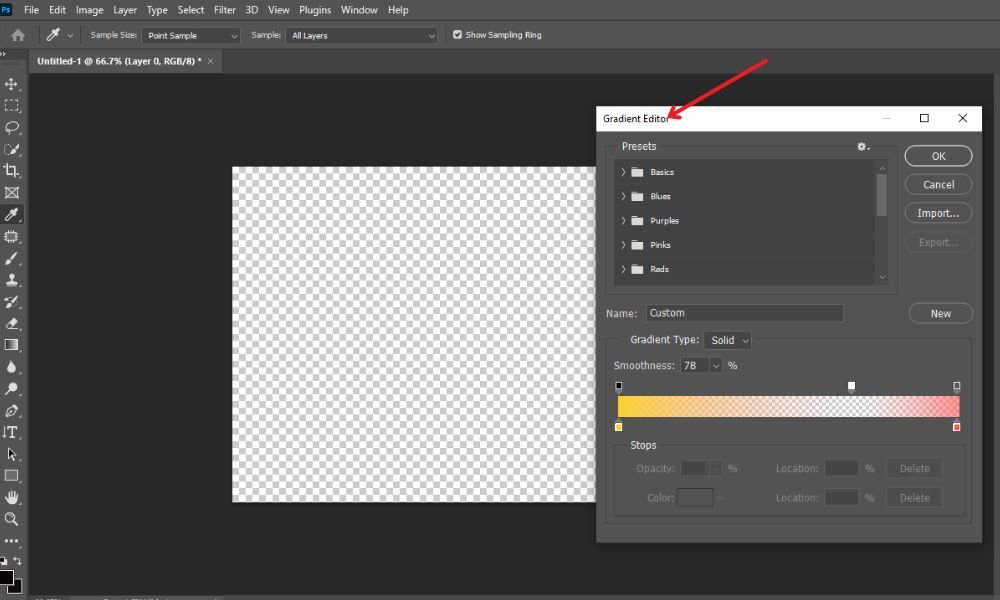
Now you can see a pop-up named 'Gradient Editor.'
There are some gradient tools in the top bar of Photoshop. To open the 'gradient editor,' click in the center of the drop-down box that resembles a full gradient.
Step#3: Selecting A Preset:
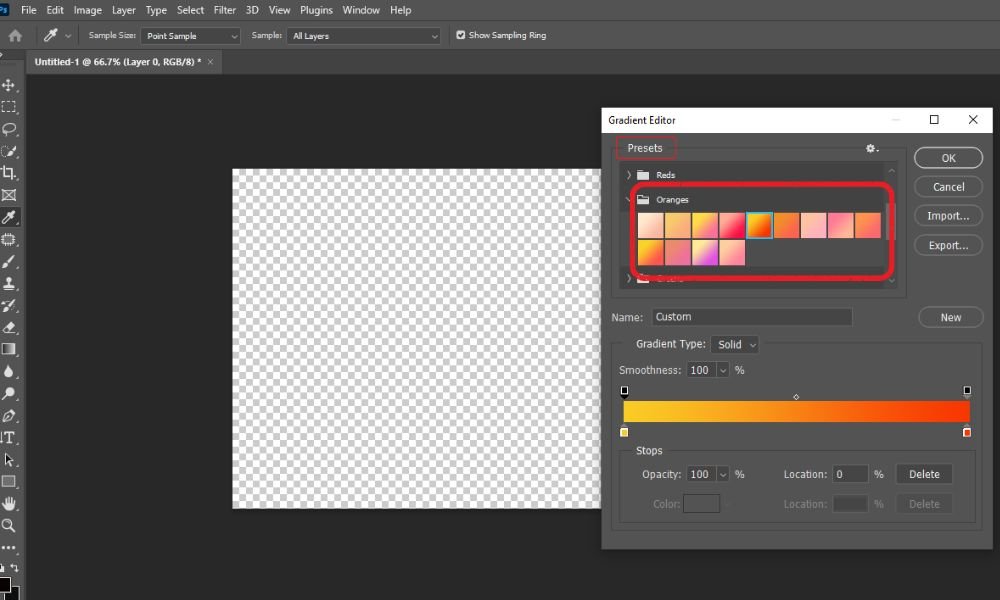
After opening the gradient editor, several presets will appear, grouped by type and color.
You can modify any preset setting to suit your preferences. The gradient bar will show a preview below if you pick any preset.
Step#4: Pick Out & Adjust Colors For Making Your Gradient:
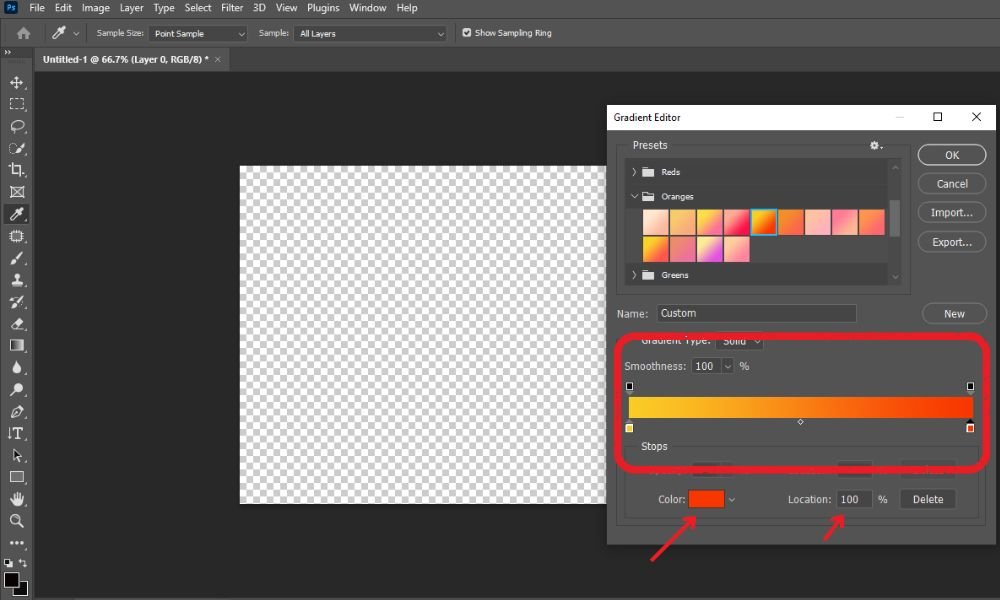
The gradient previewing bar has squares at the top and bottom. The bottom square sliders are called the 'color stops.' The top square sliders are known as the 'opacity stops.'
Adjusting the bottom sliders can alter the gradient's appearance and color blending.
Moreover, double-clicking on both bottom squares will enable you to select another different color.
Therefore, you must use the color selector to choose a new color. In the center, where the colors converge, another square appears.
Step#5: Modify The Opacity & Smoothness Of The Gradient:

As we have already mentioned, the stops at the top are used to modify the opacity. It regulates how transparent or opaque the color is in a particular region.
You can change how smoothly one color goes into the next by changing the 'smoothness' setting.
Step#6: Save The Gradient:

You need to save the gradient you have just finished now. The gradient will disappear if you don't.
To do this, fill out the 'Name' box with a name for your gradient. To include it in the presets, select the 'New' button from the menu.
Click 'Ok' to finish shutting down the gradient editor. Now you may apply your gradient to a layer or any photo.
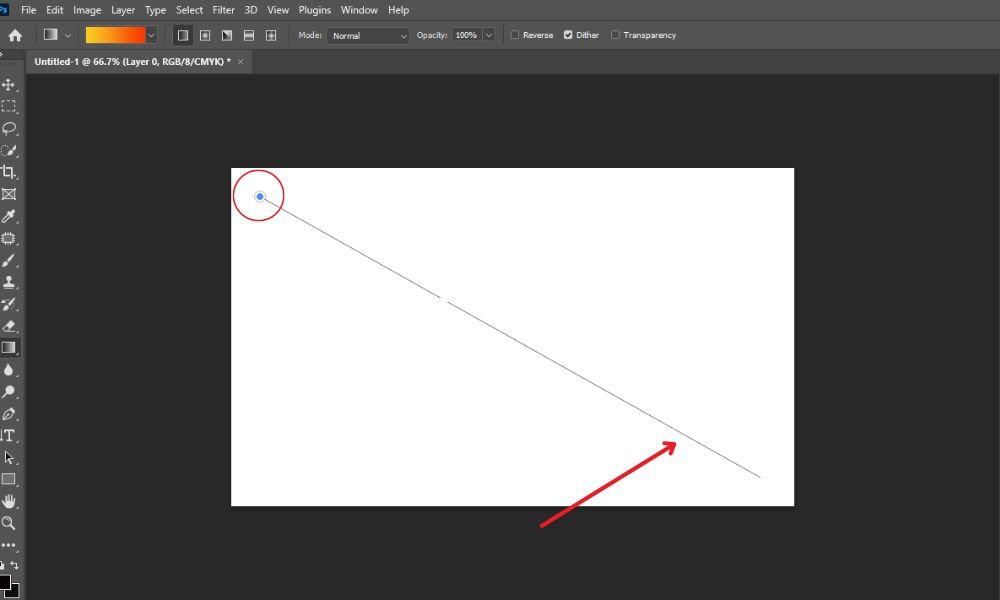
Step#7: Applying the Gradient to a Photo or a Layer:
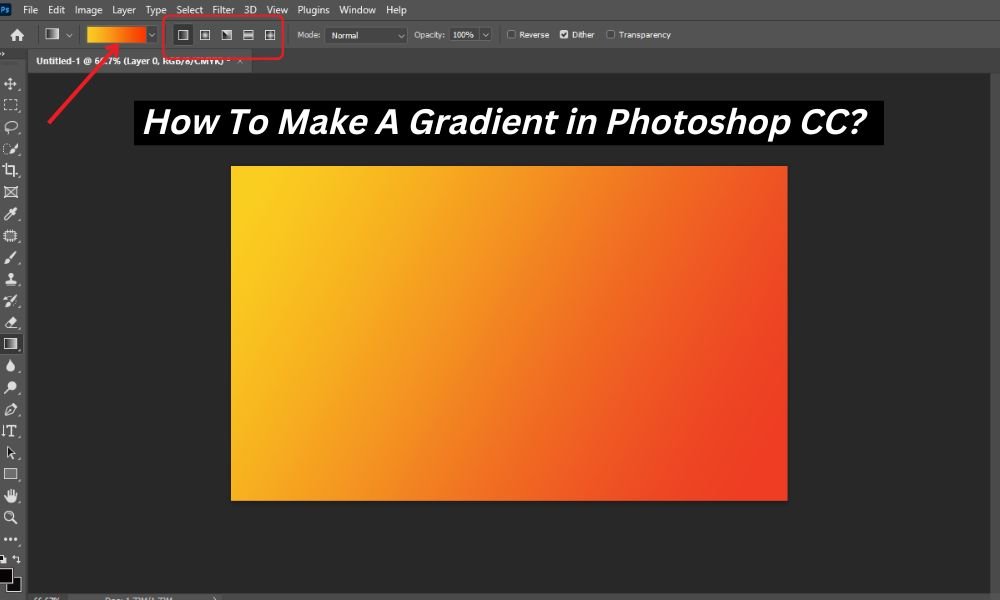
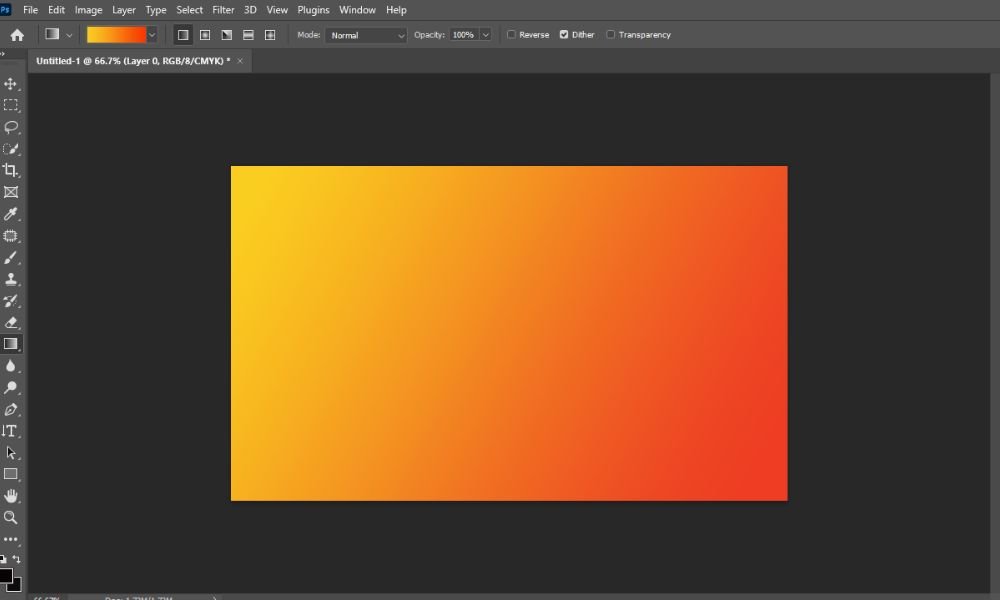
Here is the final output:
You've made the gradient, you can put it on a photo or a layer.
Launch the latest version of Photoshop and open a new photo to apply the gradient. We've chosen a white background photograph for this guideline.
Next, select the gradient tool from the toolbar menu. You can choose different types of gradients from the top bar including linear, radial, angle, reflected, and diamond. I have chosen a linear gradient. Move the pointer over the area to which you wish to apply the gradient and click.
After releasing the mouse button, you will see the transparent gradient Photoshop applied automatically.
Top 3 Tips About How To Create A Gradient in Photoshop:
- The best way to learn how to use any tool in Photoshop CC is to start with a blank page and play around with it.
- You can get different gradients for free online or save the ones you like for later. You will find many possibilities by searching online for 'preset gradient packs.' For taking them into Photoshop, you have to press the 'Import' button under the 'gradient editor.'
- In Photoshop CC, gradients are an effective tool. They can make any transition or blend effect, not just fade colors. They will work well with transparency layers to gradually blend the two layers.Here, the text can be layered over gradients. Low-opacity gradients can creatively color images and switch from color to black and white.
Final Words For Making A Gradient With Photoshop:
In this Photoshop tutorial, we've shown you how to add gradient in Photoshop using a few basic steps. If you follow these steps, the overall procedure will be easier for you to add a simple gradient into any picture or layer.
In the end, we recommend you do more research to know more complex gradients including- gold gradient Photoshop.
If you have any query or if you don’t understand any point about this tutorial, feel free to leave your valuable comment below.