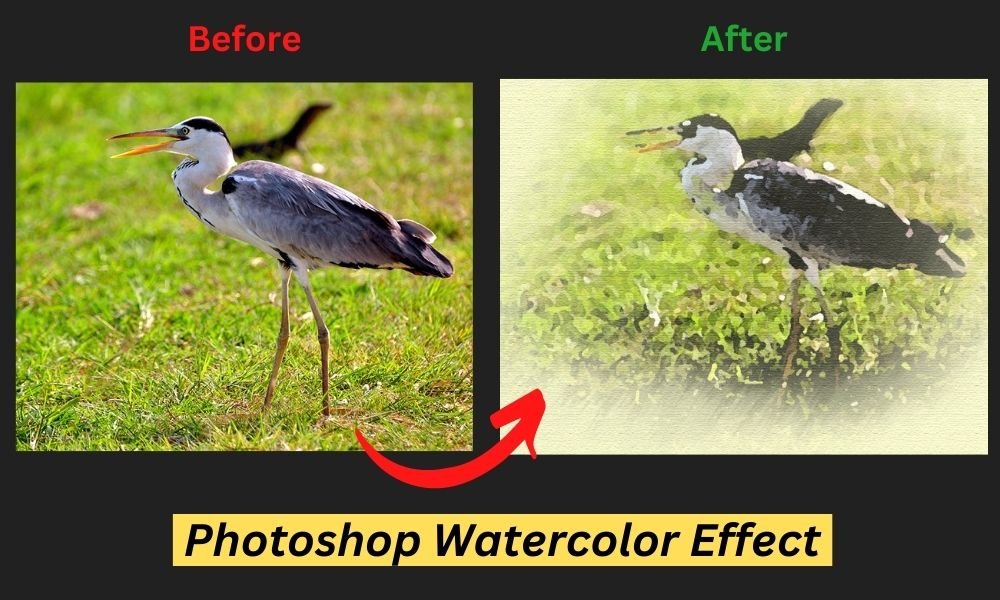
The watercolor effect by Photoshop is one of the most popular artistic pursuits out there. It's pretty mind-blowing - the way it combines texture and colors into something truly special. Believe or not, its pretty easy to add a watercolor effect to your photos - so long as you know the right steps to take.
So - I'll walk you through the simple process of applying a watercolor effect to a photo of your choice in Photoshop CC.
What Is A Watercolor?
Painting in watercolors is all about combining water-soluble paint with water to create this lovely, free-form style. As the water dries it really brings out the texture of the paper it's being painted on.
Watercolors are brilliant and delicate. As the watercolor is actually clear, the paper's texture can be seen through it. On the edges, the colors blend.
They frequently have hues that are vivid and dazzling. The topic can extend to the paper's edge. The weirdly wonderful drops and smudges are what give watercolor paintings this magical feel - it's almost like they're from a dream. The Photoshop watercolor effect has a bit of a fanatical, ethereal quality to it.
Please take note. All of the screenshots below were taken using Photoshop CC for Windows. There will be slightly different for other versions.
How To Create Water Color Effect in Photoshop? [Easy 11 Steps]
There are 11 steps that will guide you on how to apply watercolor effect photoshop technique on any photo. Let's get started!
Step #1. Open Your Photoshop Tool:
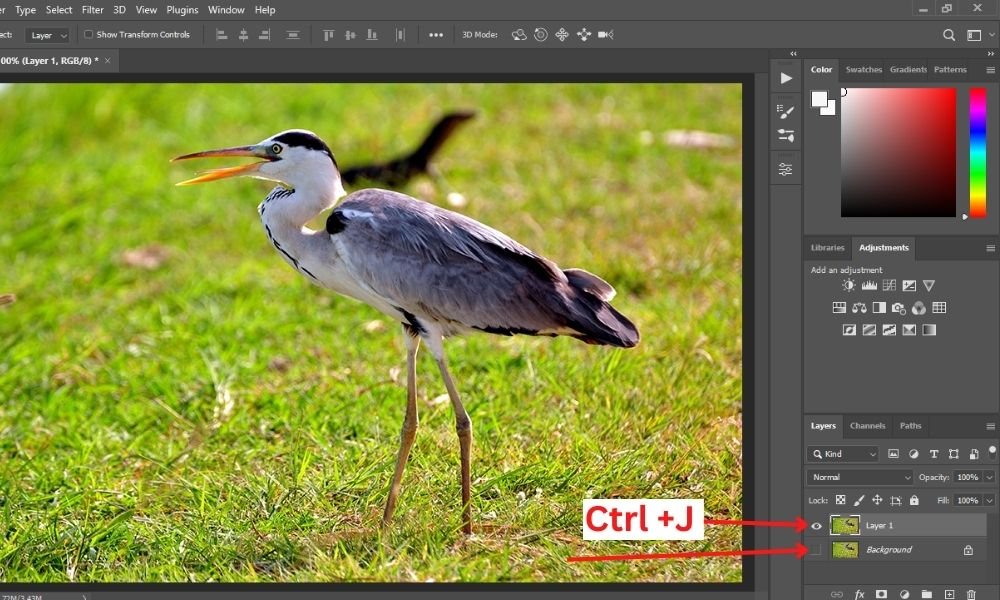
Launch your latest Photoshop application. Before you get started, you might want to make a copy of your original image at the bottom - that way you've got a safety net in case something goes wrong. To do this, just head up to the top toolbar, click on 'File' and then 'Open' from the dropdown menu.

Let's use 'Ctrl+J' or 'Command+J' to make a copy. Then, click the eye icon next to the thumbnail to turn off the background layer.
Next, right-click anywhere on Layer 1 and select 'Convert to Smart Object' from the menu that displays. Converting to a smart object allows us to change the filters we'll be using later. It's useful for fine-tuning.
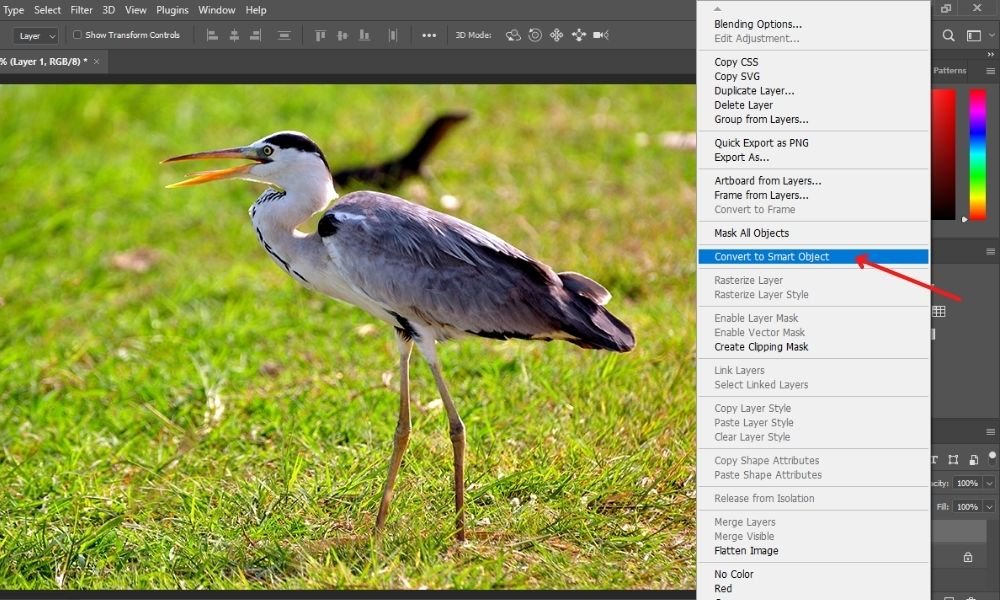
Also, if you make it a 'smart object,' you can make the layout and then change the photo to make a whole new painting without having to do all the steps again. It's another way to do the Photoshop watercolor effect.
Step #2. Adding A Watercolor Filter:
Let's begin by adding some filters. Let's start with one of the most apparent, the watercolor filter. Navigate to the 'Filter' menu and select Filter Gallery.
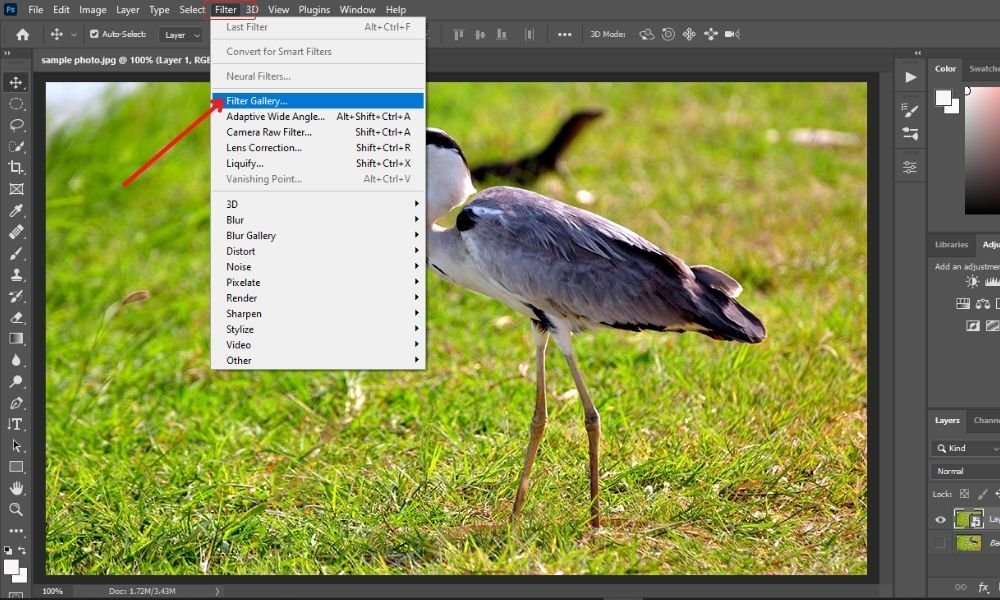
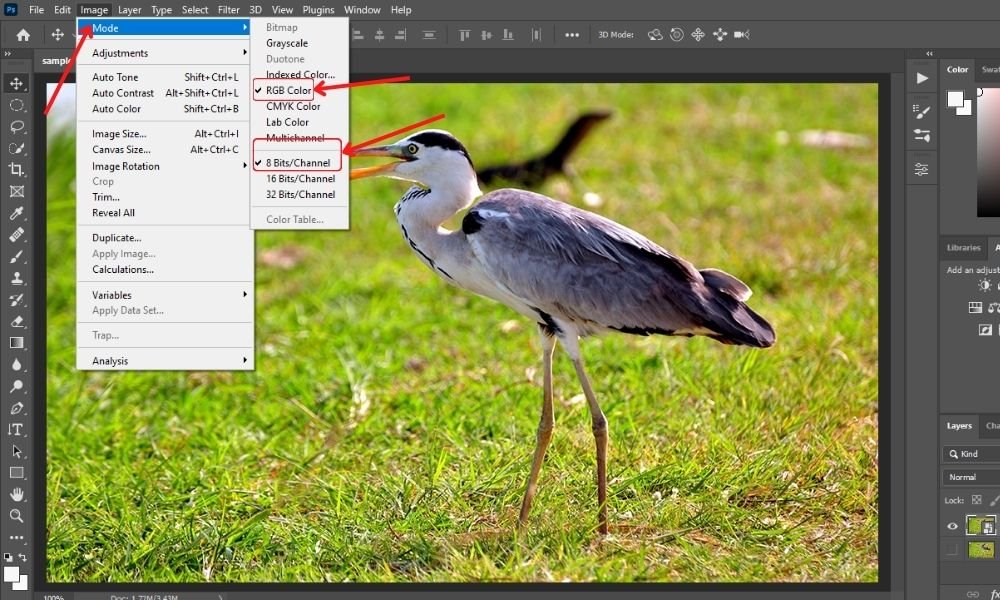
Your photo is likely in the incorrect mode if the filter gallery is grayed out. To function the filters, they must be in RGB color and 8-bit. Make sure RGB Color and 8 Bits/Channel are enabled by going to the 'Image' option in the menu bar.
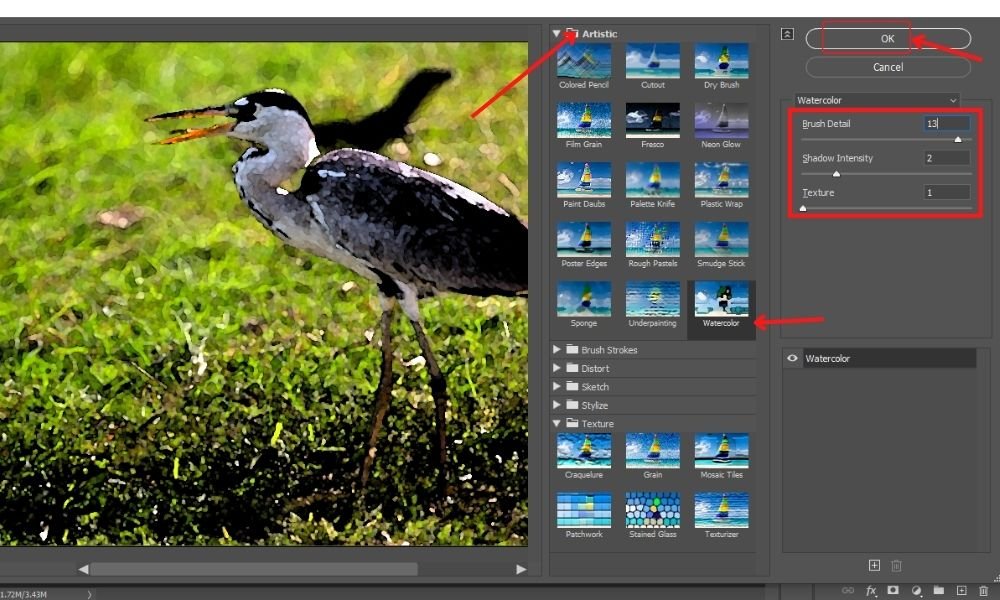
Open the 'Artistic folder' in the filter gallery and select 'Watercolor' effects under this menu. You can change the parameters on the right to make them fit your photo. Here, I scaled 13 for brush details, 2 for shadow intensity, and 1 for texture. When you're happy with the image's appearance, click OK.
Step #3. Adding A Dry Brush Filter:
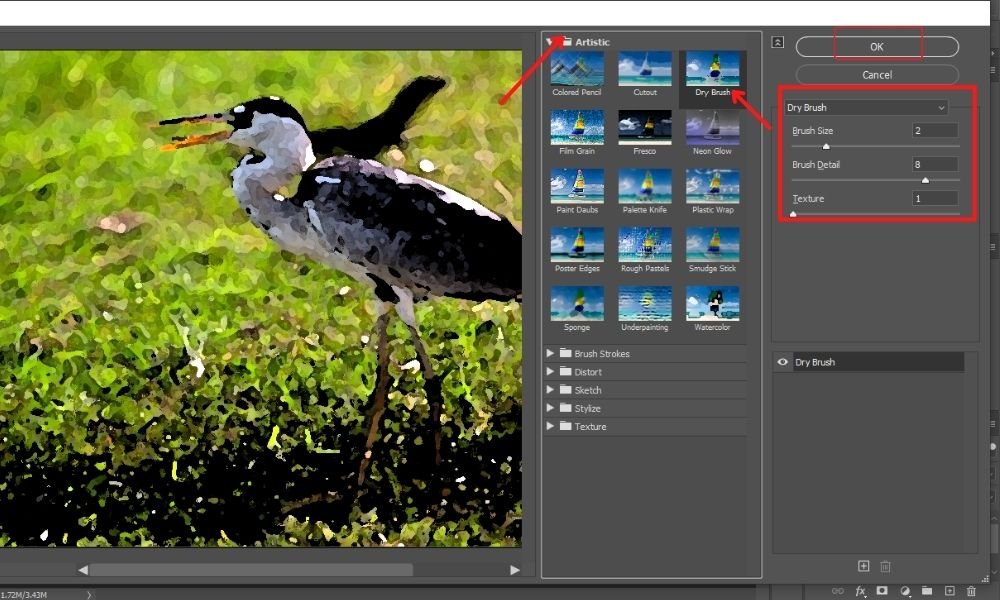
Once more, select the Dry Brush filter from the Artistic folder in the filter gallery. My brush size, brush detail, and texture values are set at 2, 8, and 1, respectively, but you can change them as necessary. When finished with the settings, click OK.
Step #4. Adding A Cutout Filter:
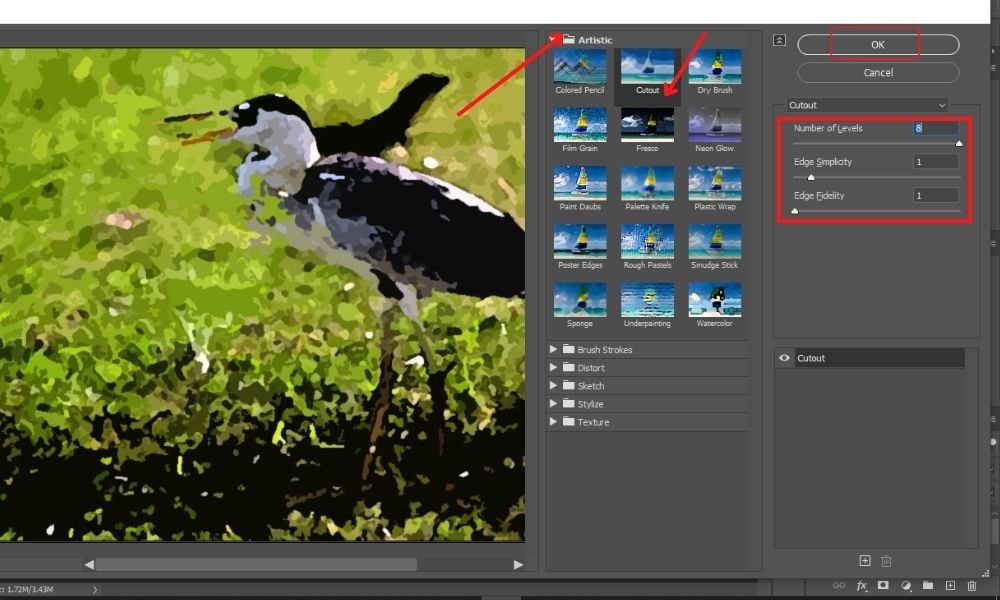
Return to the 'filter gallery' and choose 'Cutout' from the 'Artistic folder' this time. I set the edge fidelity to 1, the edge simplicity to 1, and the number of levels to 8. Then click on the 'Ok' button.
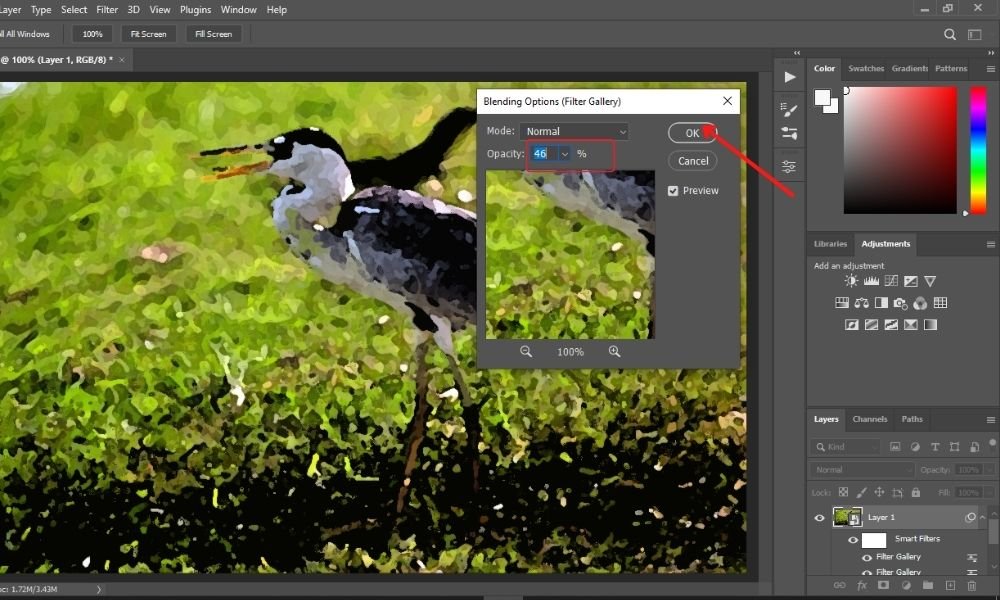
This Photoshop watercolor effect still has a bit of power. By double-clicking the 'Blending Options' button for the cutout filter, let's change the layer's opacity level. Just go to the layers' panel on the right side of the applied filter. You'll get a settings icon there.
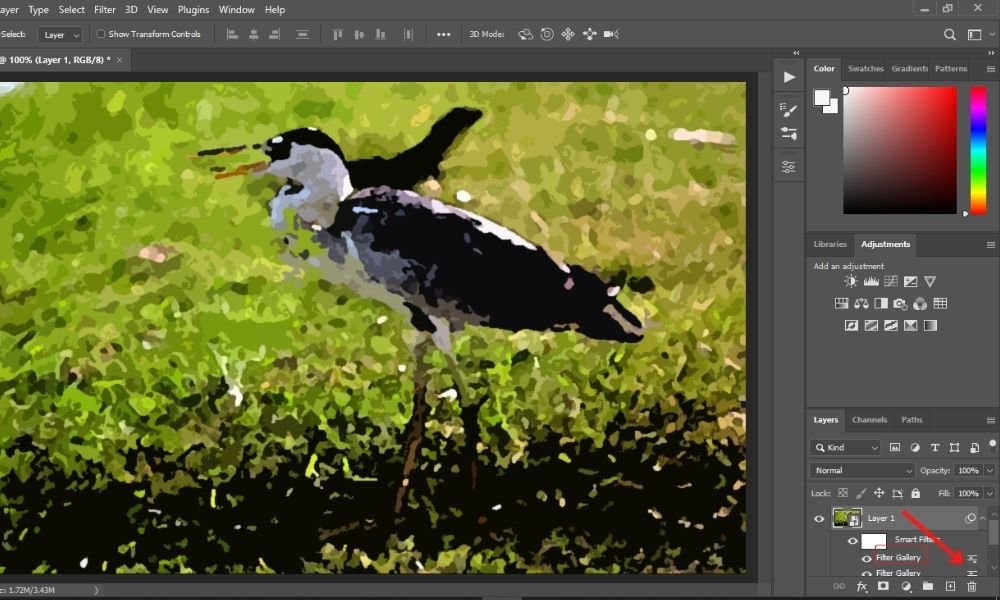
Now, you need to set the 'Opacity' level around 40-50%.
Step #5. Adding The Texture:
To get a more authentic watercolor feel, it helps to think about how they're normally created on canvas - so the paper will have this slight roughness to it. We need to add some texture to avoid it looking like a digital build and so on.
You can get this effect by selecting the blend mode multiply and overlaying a paper texture photo on top - or alternatively, use a texture filter, which is what we're going to do today.
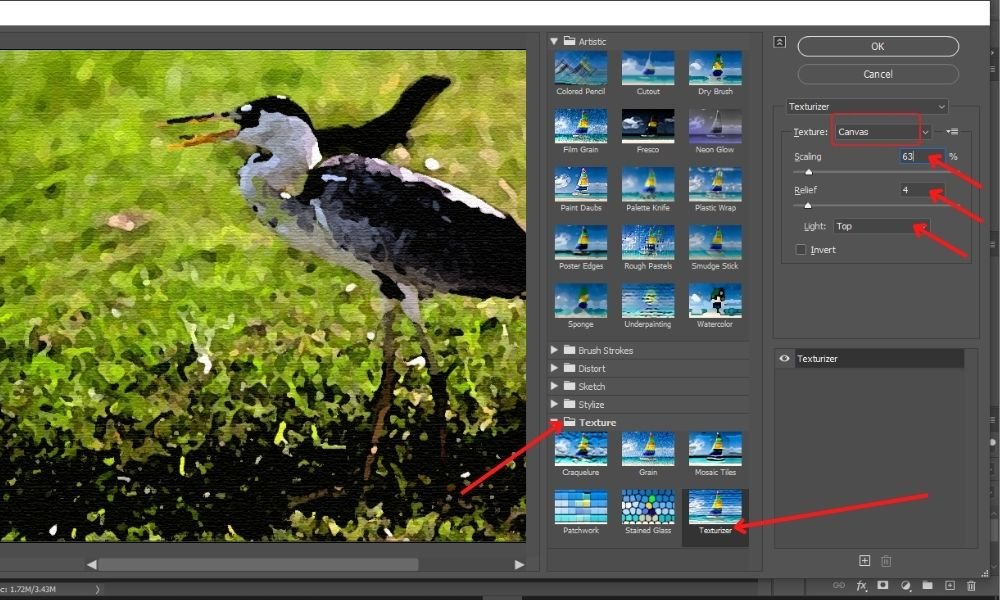
Now return to the 'Filter Gallery' for one last time. This time head over to the Texture folder. Inside the Texture box you will have 4 different textures to choose from - burlap, brick, canvas and sandstone. We'll go with the canvas option.
The values listed below allow you to alter the texture's appearance. A lower proportion in scaling produces a finer texture, whereas a larger number produces a rough texture.
However, relief brings in more lighting, which helps to define the textures. You can choose the direction of the light that falls on the texture using the light box.
Alright , I've got my scaling at 63%, relief cranked up to 4 and the light shining in from the top - fingers crossed that's just the ticket. So once you've got all your settings sorted, click OK to lock it in
Step #6. Adding The Smart Blur:
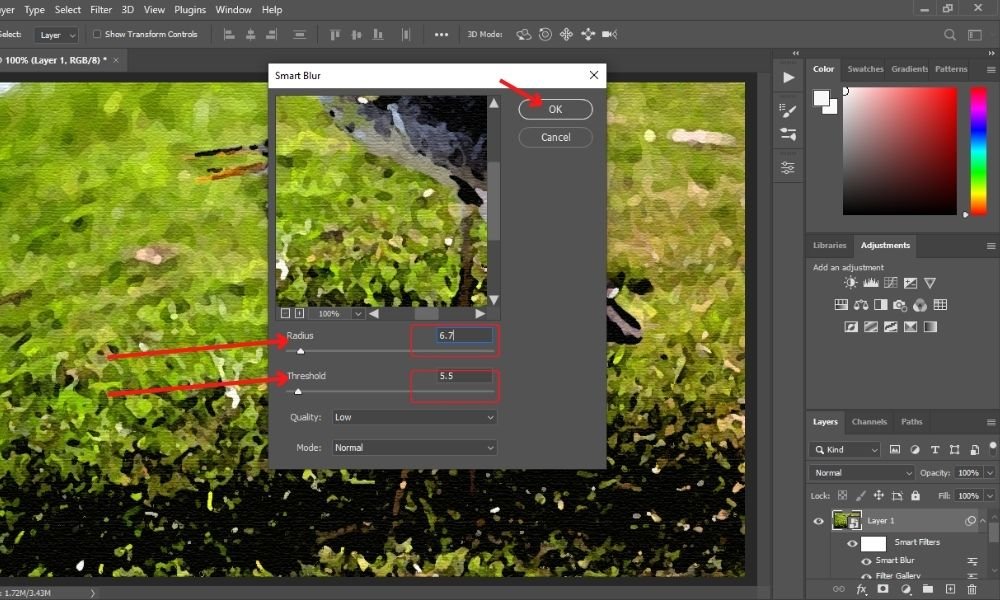
Things are looking pretty sharp at this stage, but let's be honest its a little too in your face, so I'm gonna head into Smart Blur to dial it back a bit. I'm going to 'Filter', hover just over 'Blur' and then click on Smart Blur - sounds simple enough.
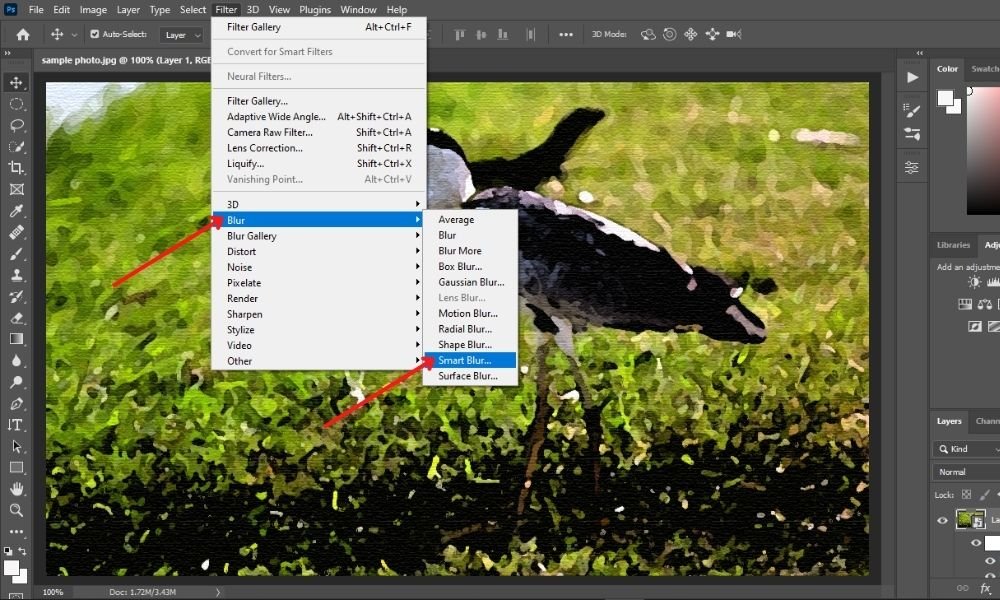
We merely want a modest effect, therefore I've adjusted my Radius and Threshold parameters to very low ranges. Finally, select OK.
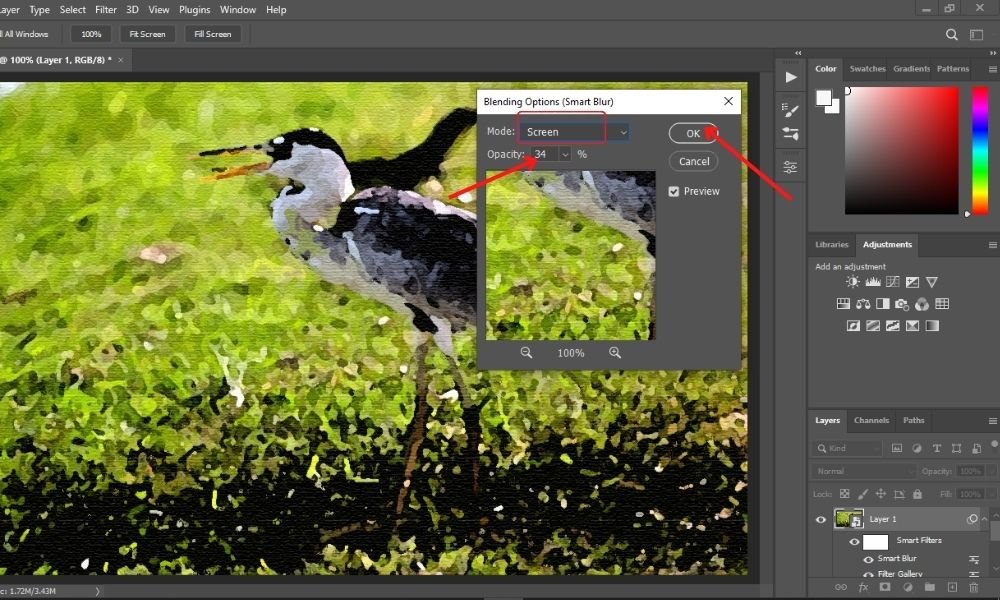
Let's carefully mix this effect into the photo. To use the 'Smart Blur filter,' double-click on the Blending Options icon.
![]()
![]()
Adjust the blending mode to 'Screen' and then set up the 'Opacity' level to approximately 34% in the box that appears.
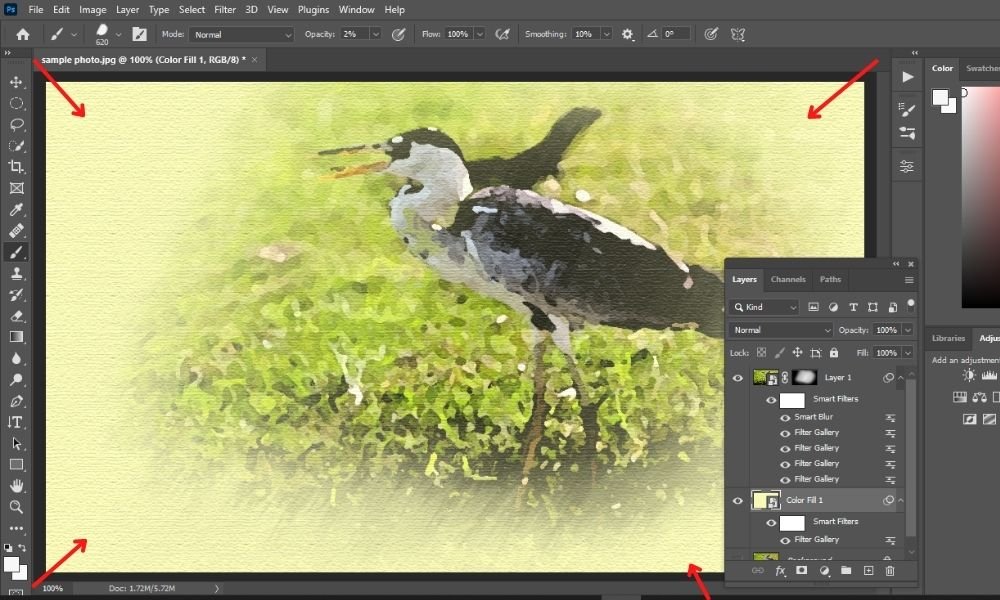
Step #7. Adding a Solid Color Fill Layer:
We would like to place a 'canvas' behind the photo because subjects in watercolor paintings are typically not completed to the edges.
For this bit, I'm going to create a solid color fill layer - this is where things start to come together. At the bottom of the Layers window, I click on the adjustment layer icon and hey presto a half-filled circle appears - quite a giveaway that one.
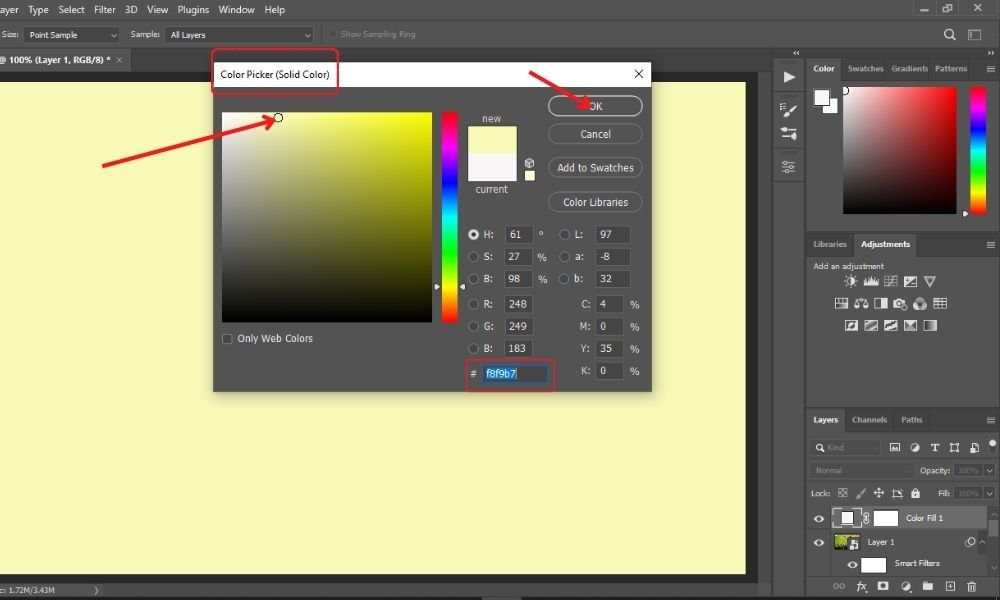
From the menu, select 'Solid Color.'

Next, the color picker option will appear. You can use a completely white canvas, but I loved this image better when it was cream. In the end, you are free to choose any hue or color.
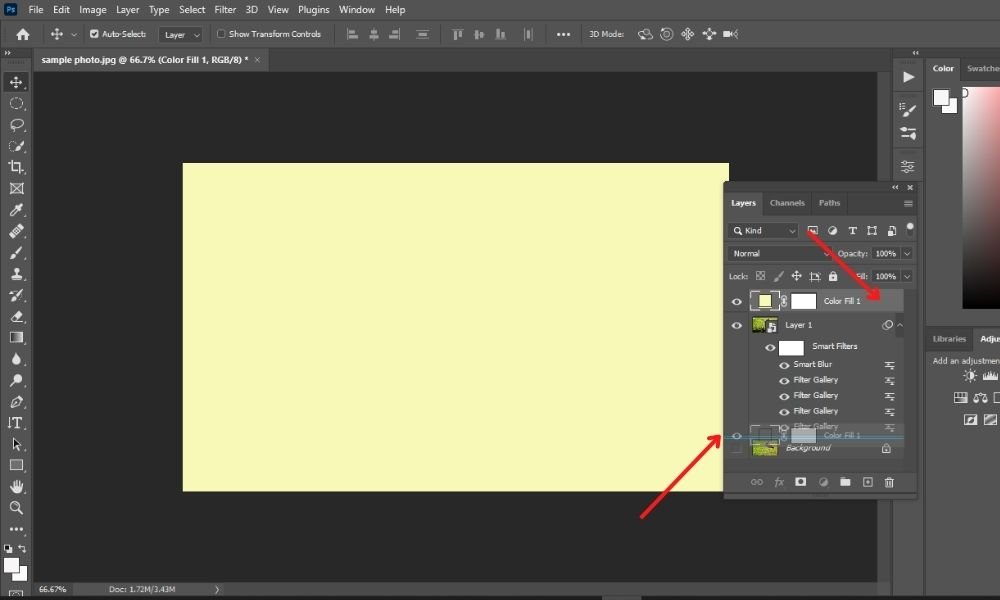
The photo will be covered by the fill layer. Set the color layer under the image layer by grabbing the fill layer and dragging until the blue lines emerge. The picture has returned to the top.
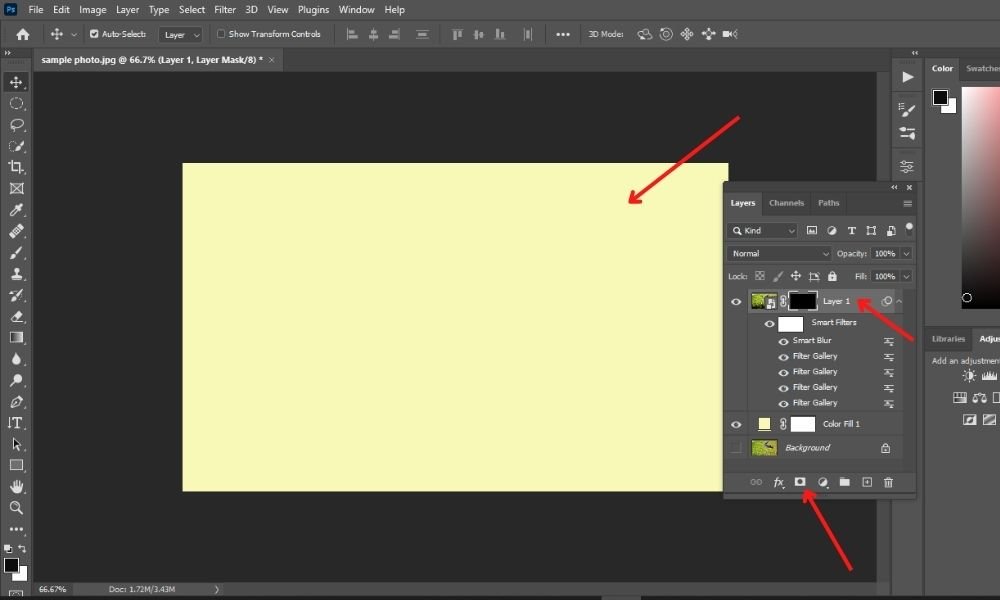
Step # 8. Adding A Negative Mask:
As though the photo was drawn on a canvas, the solid color should be visible around the borders. Let's make a negative mask on the image layer to accomplish that.
Hit the 'mask button' at the bottom of the' layers panel' while holding down the Alt or Option key and selecting the picture layer. The photo layer has just been 'hidden,' repositioning the color fill layer over it.
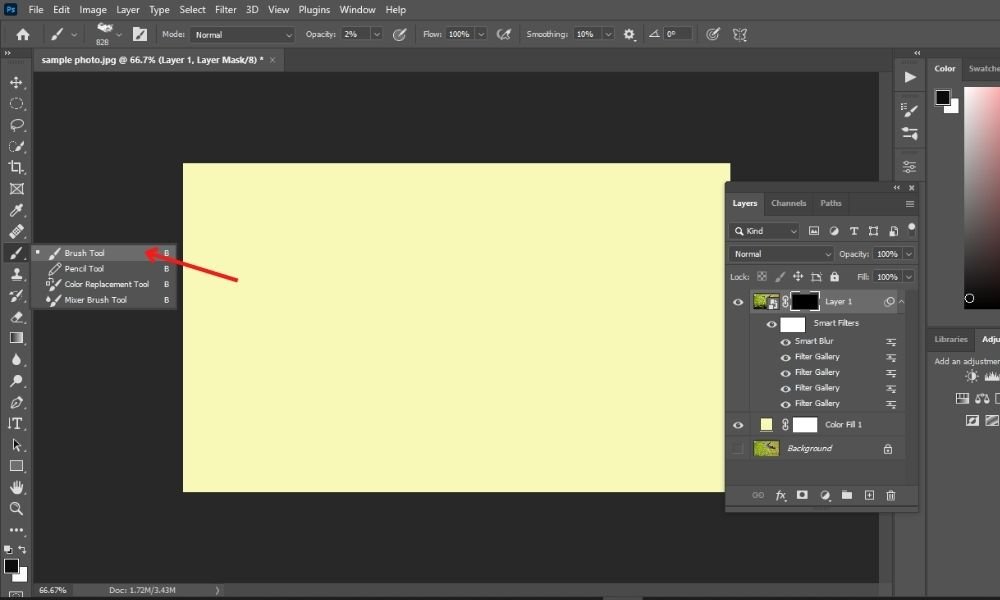
Step #9. Brushing On the Photo Appropriately:
Remember that white shows and black hides. Now Ill just have to add some life to this picture by giving it a bit of a paint job using a white brush to 'draw' on this black mask - sounds a bit weird but just go with it . To fire up the brush tool, I hit the 'B' button on the keyboard or select it from the toolbar on the left side.
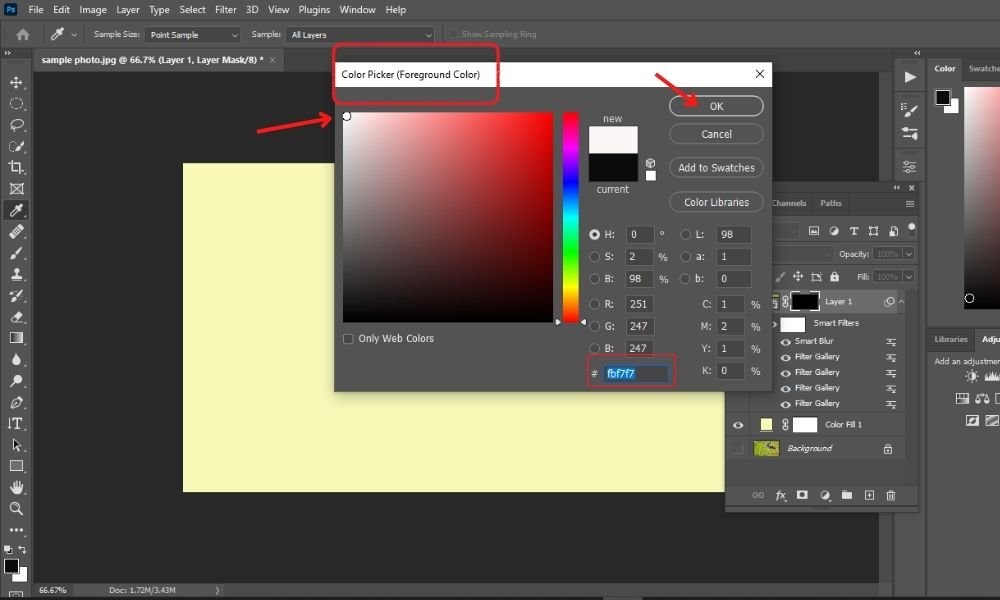
Using white as the foreground color, begin painting over the picture.
Time to get creative so I choose some vibrant watercolor brushes to give the photo that authentic watercolor look and feel.
You should use a watercolor brush to draw the picture for the best results. Almost any shape or type of Photoshop brush bundle can be found online for free.
To be honest, adding some nice soft edges is a breeze using the latest watercolor brushes. If you cant for the life of you find what your looking for, dont worry, creating your own brushes is easier than you think.
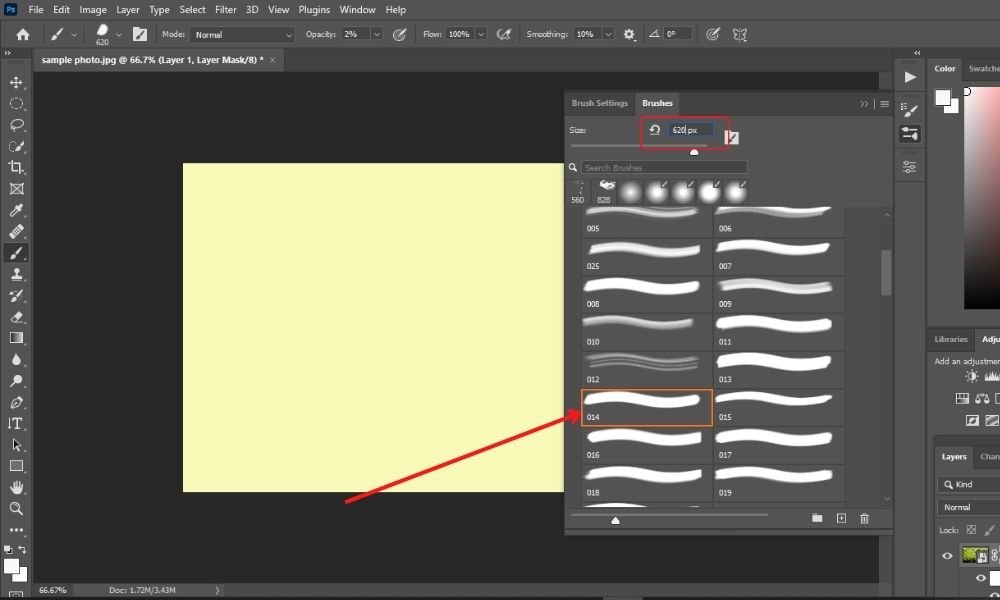
Start painting over the image till you are satisfied with the output.
Step# 10. Texturize the Fill Layer:
The photo is the only thing that is modified by the texture filter we applied. You might have noticed that the texture is no longer visible at the image's boundaries when the fill color peeks through.
Now, choose the 'Color Fill 1' layer. Then click on the 'Filter' and select the 'Filter Gallery' from the drop-down menu.
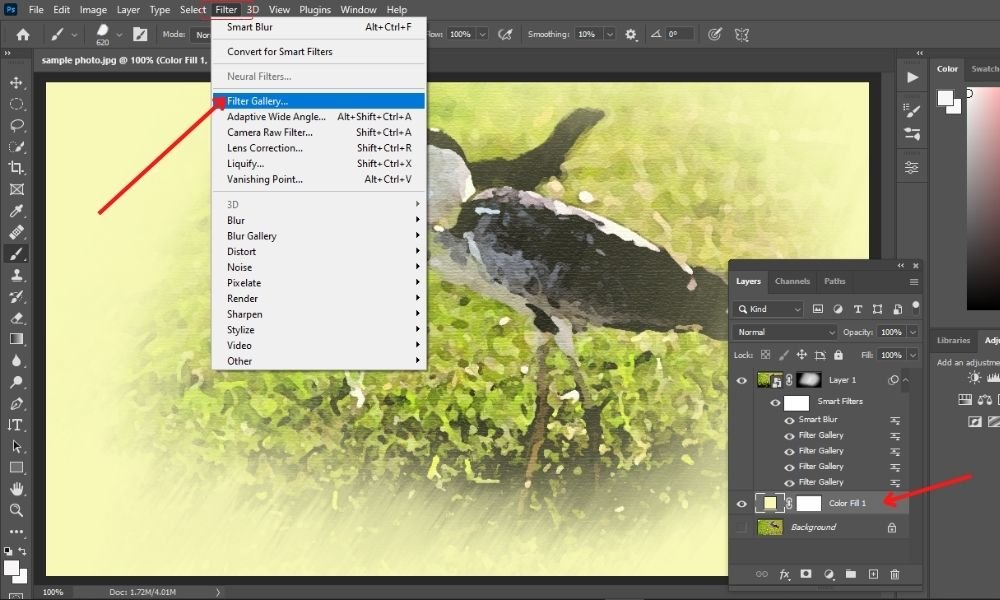
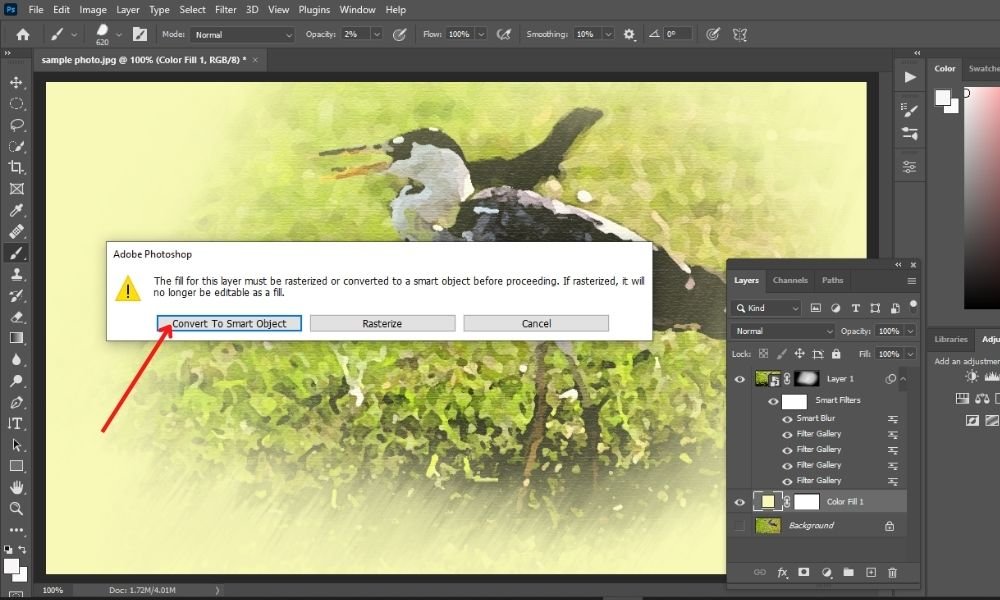
After selecting the 'Filter gallery', a pop-up window or message will reach you. Now, simply click on the 'Convert to Smart Object.' option.
When the 'filter gallery' opens, choose the 'Texturizer' filter from the Texture folder. The previous settings will be kept automatically. Now, click OK without making any changes.
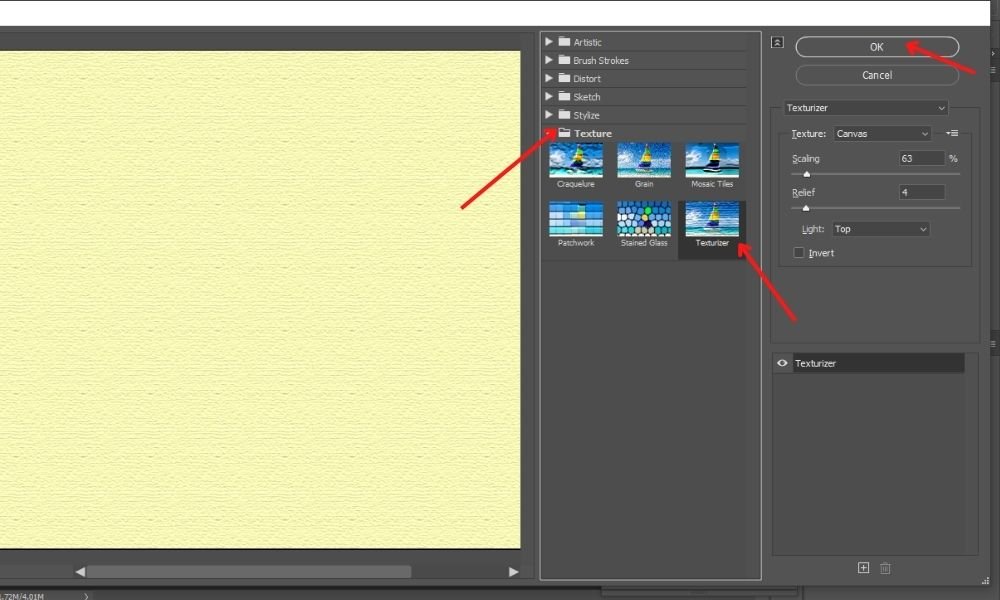
Next, you can see that the edges will have the canvas texture. That looks amazing!
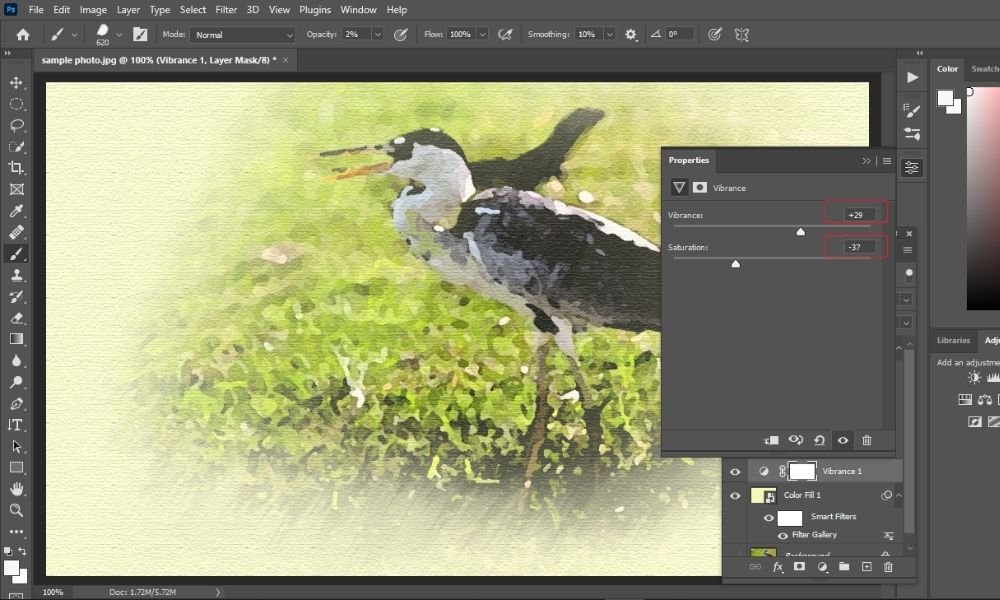
Step# 11. Adding The Adjustment Filters:
We may use a few adjustment layers to give the photo a look that is more reflective of watercolor. Select 'Vibrance' by clicking the Adjustment Layer button once again.
![]()
![]()
Reduce the 'Saturation' while increasing the 'Vibrance.' This contributes to the watercolor's washed-out appearance.
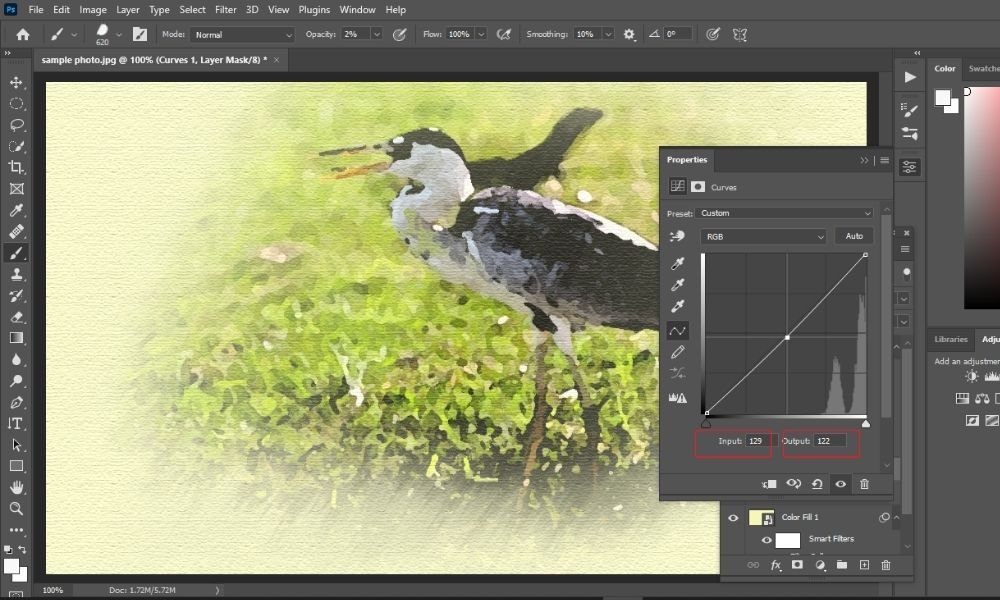
A little contrast will also help some pictures. Return to the icon for the adjustment layer and choose 'Curves.'
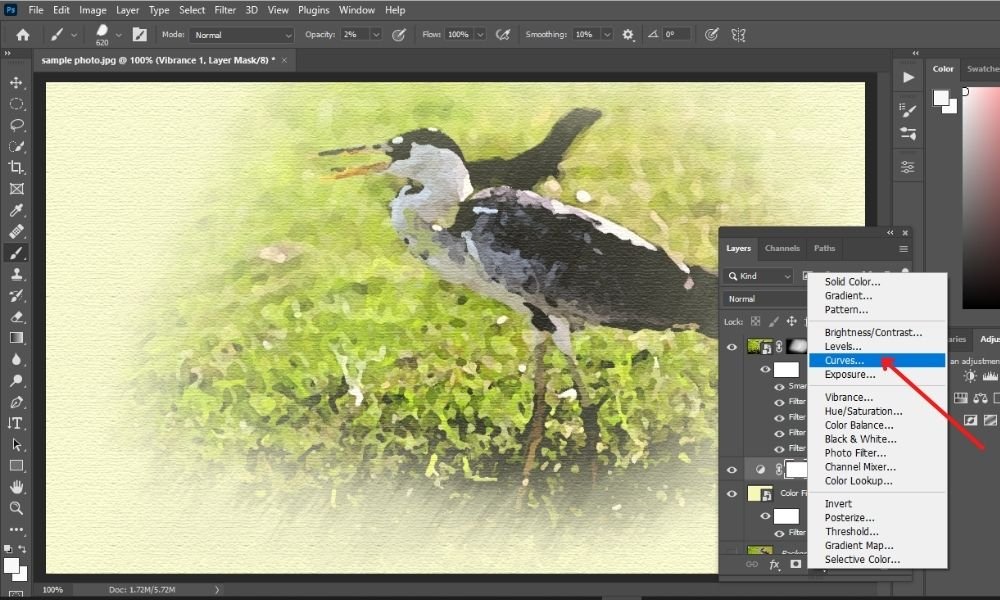
Raising the brightness and lowering the blacks will depend on how well your photo works.
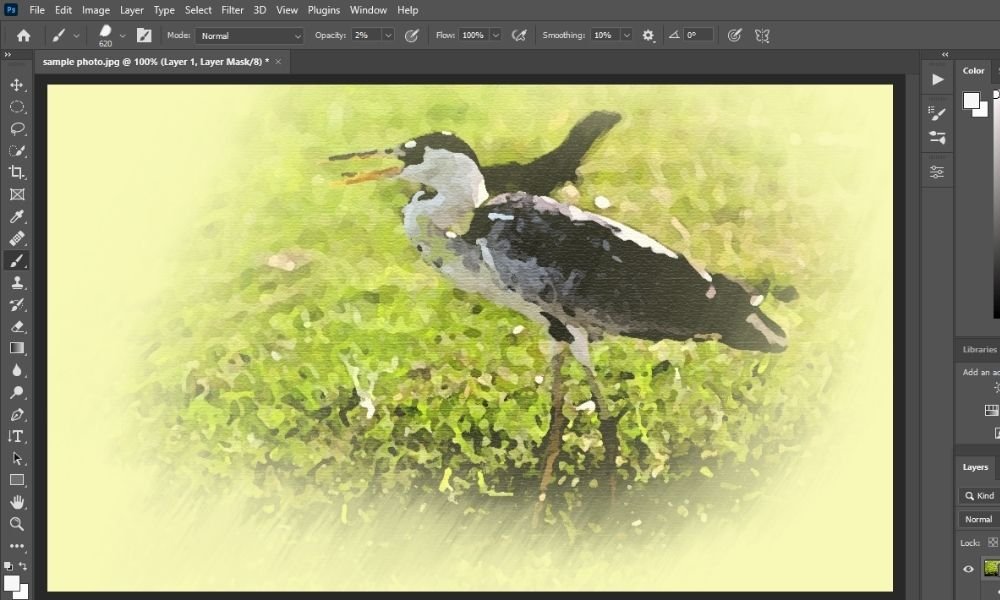
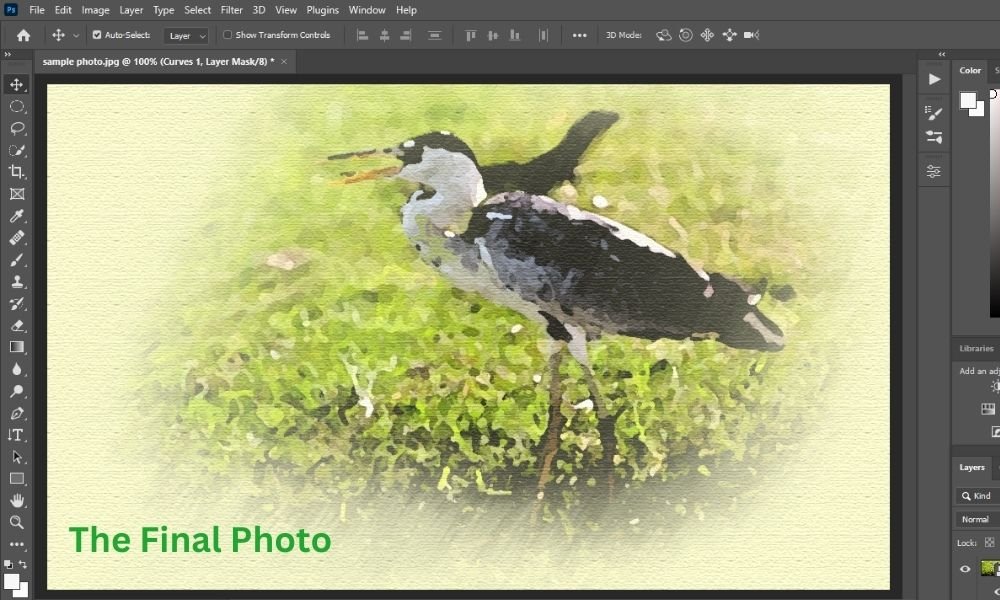
Here's the final output! Done! Congrats!
Final Words About Photoshop Watercolor Effect:
To put it bluntly, anyone can create a watercolor effect in Photoshop by following the simple steps outlined here. By now you've learned how to use a few filters, a bit of Smart Blur, a load of brushes, blending modes and a paper texture overlay to get that watercolor look in Photoshop CC.
Our Latest Photoshop Related Tutorial: How to remove watermark from the image in Photoshop CC?