You can take screenshots on iPhone 15, iPhone 15 Plus, iPhone 15 Pro or iPhone 15 Pro Max with minimum effort. It involves a combination of two physical buttons to capture the screenshot. The process was quite similar in the older versions like iPhone 14, iPhone 13, etc. Please follow the steps below to start taking screenshots on your iPhone 15:
Conventional Method: How to Take a Screenshot on iPhone 15
- Adjust the Screen: Please make sure the content you want to capture appears on the screen of your iPhone.
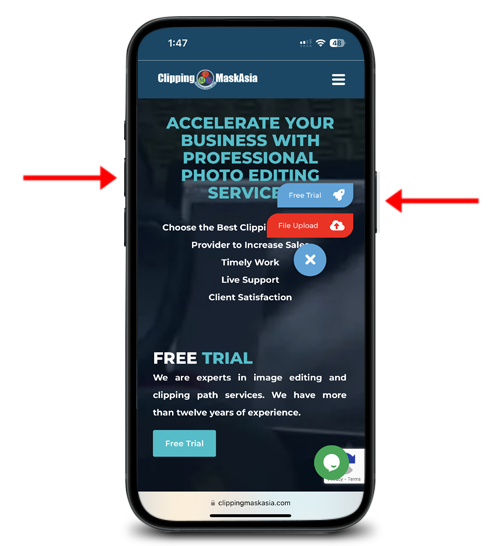
- Pick-up the Buttons: In most iPhones including iPhone 15, you’ll find two physical buttons. These two buttons are used to take a screenshot:
- Sleep/Wake Button: This button is also known as the Side Button. It remains on the right side of the phone.
- Volume Up Button: This button is located on the left side of iPhone 15.
- Press & Release to Capture: Simultaneously press and release the Sleep/Wake button and the Volume Up button. You need to press these buttons simultaneously and release them quickly to capture.
- Capture Confirmation: You will hear a camera shutter sound (if your sound is enabled) and the screenshot will appear as a thumbnail on the bottom-left corner of your phone screen.
- Adjust Screenshot Area: Touch and modify the thumbnail as you require. It will allow you to crop the screenshot according to your required portion.
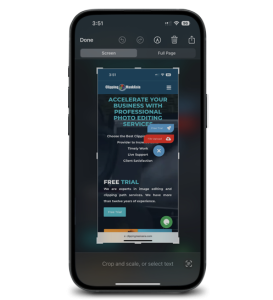
- Save or Share the Screenshot: Now, click on “Done” menu in the top-right corner and select the save location from the pop-up menu to save it.
You can directly share the screenshot by hitting on the share icon from the top-right corner to share it with your email, WhatsApp or any other sharing applications.
Method 2: AssistiveTouch Shortcut
If it seems inconvenient to press physical buttons, you may use the AssistiveTouch feature to take screenshots as well. Here’s how to do it:
- Activate AssistiveTouch Option: Go to ‘Settings’ > ‘Accessibility’ > ‘Touch,’ and hit on ‘'AssistiveTouch' to enable the option.’
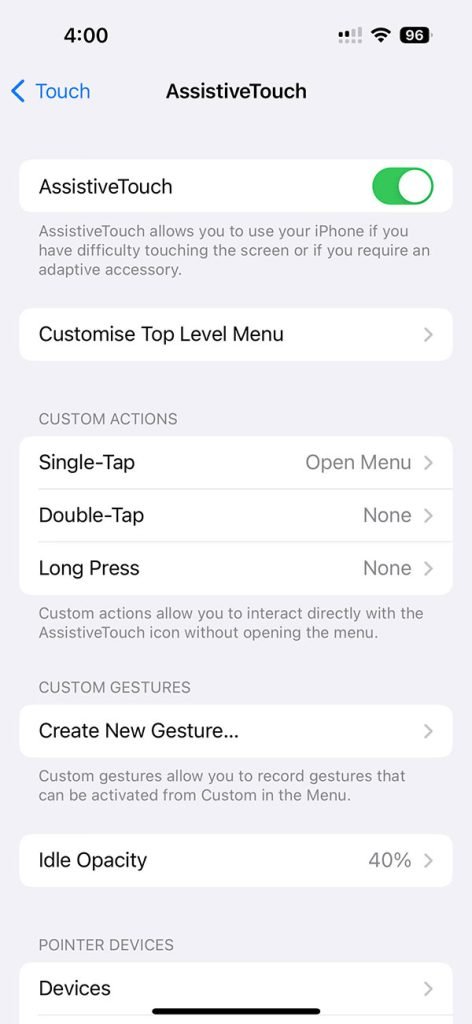
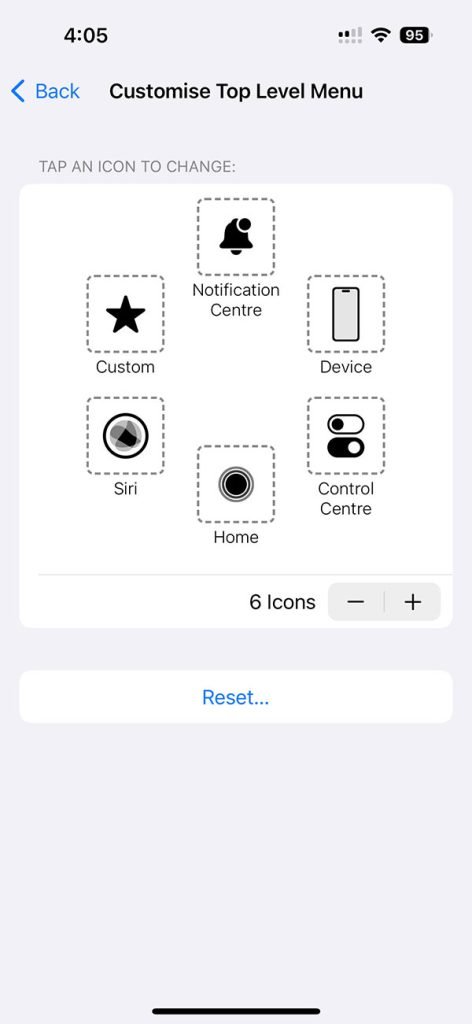
Customize Top-Level Menu: Tap ‘Customize Top Level Menu’ from the AssistiveTouch setting options. Add the ‘Screenshot’ option by clicking on the ‘+’ symbol. You can also customize the icon as per your choice.
Take a Screenshot: With AssistiveTouch enabled, an AssistiveTouch button will appear on your screen. Tap it, then tap ‘Screenshot.’ The screenshot will be captured, and you’ll receive a confirmation in the form of a brief flash.
The AssistiveTouch method allows other alternative options to take screenshots. As an example, you can set a double-tap on the AssistiveTouch button to capture a screenshot. Another option is to press and hold action on the AssistiveTouch button to take a screenshot. These methods can be customized in the settings panel of the AssistiveTouch menu.
Capture Confirmation: If your phone sound is enabled, you will hear a camera shutter sound. This is a confirmation sign of the screenshot. The screenshot will appear as a thumbnail on the bottom-left corner of your phone screen. Ensure your device is not in silent mode to hear the shutter sound.
Access Your Screenshot: Like the conventional method, you can edit, save, and share the screenshot.
Also Read: HOW TO MAKE BACKGROUND TRANSPARENT IN PHOTOSHOP
Method 3: Using Hey Siri
Yes, Siri can be a powerful method of taking screenshots on your iPhone. This option is quite useful for you if you prefer voice commands. Let’s see how it works:
- Activate Siri: Either say 'Hey Siri' or press and hold the side button (or Home button on older models) to activate Siri.
- Command Siri: Just say 'Take a screenshot,' and Siri will capture a screenshot of your current screen instantly.
- Access the Screenshot: Like the previous methods, you can modify, save, share and discard the screenshot.
Method 4: AssistiveTouch Gesture
AssistiveTouch enables you to create custom gestures for capturing screenshots. This method is very handy if you want to take screenshots with a single tap instead of using any virtual button:
- Enable AssistiveTouch: Follow the same steps as in Method 2 to enable AssistiveTouch.
- Customize Custom Gestures: Tap ‘Customize Top Level Menu’ in the AssistiveTouch settings, then select ‘Custom’ under ‘Custom Gestures.’
- Create a Gesture: Hit on the ‘+’ icon to create a new gesture. You can draw any shape or pattern you like; a simple ‘S’ or ‘L’ can be easy and convenient.
- Name Your Gesture: Give your gesture a name, like ‘Screenshot,’ and save it.
- Take the Shot with Your Gesture: Whenever you want to take a screenshot, activate AssistiveTouch, tap ‘Custom,’ and then draw your ‘Screenshot Gesture.’ It will capture the screen as soon as you perform the assigned gesture. After capturing the screenshot, you can navigate back to the home screen.
- Access Your Screenshot: As with other methods, you can edit, save, or share the captured photo.
How to Take a Screenshot on Phone 14
You can take screenshots on your iPhone 14, iPhone 14 Plus, iPhone 14 Pro, or iPhone 14 Pro Max following the same methods of iPhone 15 series. Screenshots are automatically saved to the photo library in the Photos app. Pick any of the four methods that suits you the best to capture the screenshot on your device. Users can swipe left to dismiss the screenshot thumbnail. It works for other previous versions like iPhone 13 or iPhone 12 series. On older iPhone models, you can use Touch ID to take screenshots.
Please note, that the specific button combination and method may change with new iPhone models and IOS updates. Please stay updated with our blog posts to know about any changes in case of new iPhone models or IOS updates.
Knowledge Source: https://support.apple.com/guide/iphone/take-a-screenshot-iphc872c0115/ios

Asha is working as a Creative Director at Clipping Mask Asia. She has completed her Graduation from the University of Dhaka inFilm and Television Studies. She has vast knowledge in Photography, Videography, Video Editing, 3D Modeling, Rendering and Animation. She loves to explore the creative world with her academic knowledge, experience and creative mind. She writes creative blogs on design, illustration and editing for renowned brands like Clipping Mask Asia.