Photoshop image manipulation is an effective image editing technique that is popularly applied on processing garments image. Today, I will show you step by step technique of joining the neck of a shirt image to create ghost mannequin effect. The steps are all about removing the dummy from garment image and to manipulate the missing area behind the dummy so that, it appears as a complete one.
Step 1:
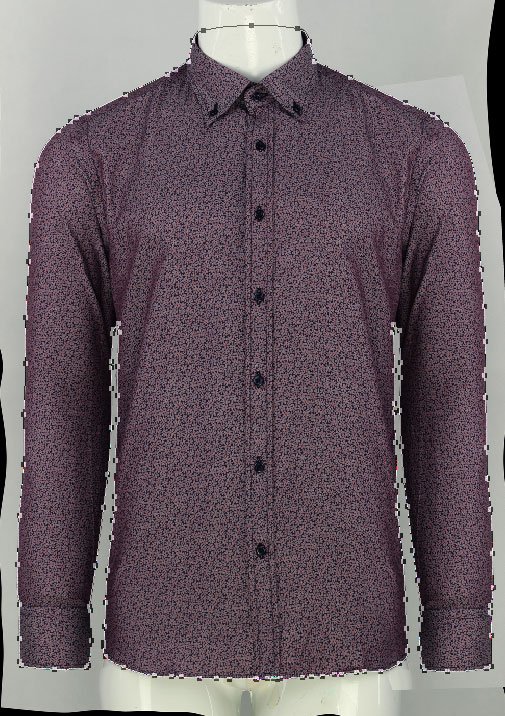
The first step of doing Photoshop image manipulation is to cut out the garment from the original background. Here, you have to apply clipping path technique to do the extraction properly. You have to simply crate photo clipping around the object with the help of Photoshop pen tool. You need to be a bit careful while creating professional clipping path, otherwise it will impact badly on the process of image manipulation.
Step 2:
The next step is to cut out the front shot from the existing background with the help of clipping path that, we have already created in the first step. In order to accomplish this step you have to select image clipping by pressing Ctrl/Command + enter. Once the selection is done apply 0.3 pixels to 0.5 pixels feather. Then, click Ctrl/Command + j. It will cut out the image on a new transparent layer. You can apply any background below the cutout layer while we are using pure white background.

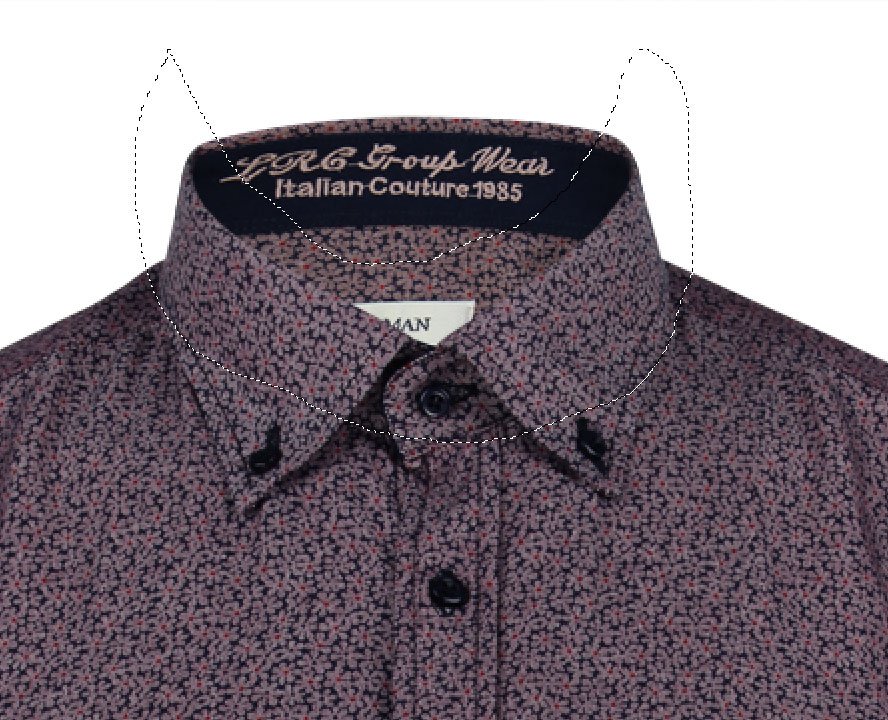
3’rd Step:
Now, you have to cut out the neck part from the helping shot and to import it in the main image like below screenshot:
Place the helping shot below the main garment layer. You should have the layer arrangement like following screenshot:
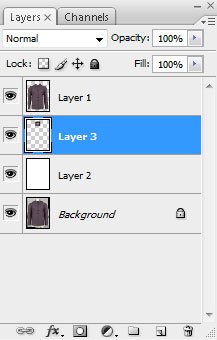
layer arrangement
Step 4:
In this step you have to adjust the helping image below the neck area. Photoshop wrap tool can be very helpful in this regard. The adjustment should be like the below image:
Step 5:
Now, you have to cut off the unnecessary part from both font image and helping image. Create smooth clipping path do it. Check the image below to guess how the photo clipping should be in this case:

Now, remove the unnecessary part from the both images. Make selection the image clipping by holding Command/Ctrl and pressing Enter key on your keyboard. Then simple click on the font image layer and press Backspace or Delete and repeat it again by selecting the helping image layer. Now, you will have the pure garment image like the following one:

Step 6:
We are almost done with the Photoshop image manipulation process. This is the last and final step that will make awesome ghost mannequin out of the neck joining process. You have to apply a bit shadow effect on the neck area to make it more natural and real. Just copy the helping layer and create a “U” shape selection with lasso tool like the screenshot:
Apply 20-50 pixels feather and click on the vector mask icon from your layer plate. It will create a layer mask which has to be multiplied. See Blow:

You can adjust the hardness of the shadow created inside in the neck by adjusting the opacity of the layer.
Photoshop image manipulation is quite easy while you are just joining the neck of an image but there are different advanced manipulation techniques which are quite complex and subtle to adopt. However, if you can follow this tutorial properly you must be able to proceed towards advanced Photoshop image manipulation techniques like face replacement. Clipping Mask Asia can be your helping hand for any kind of photo manipulation service at the most affordable cost.